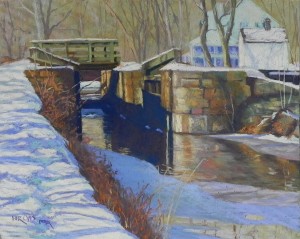
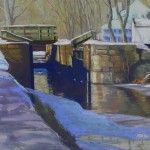
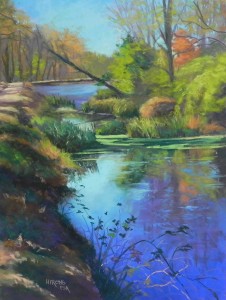
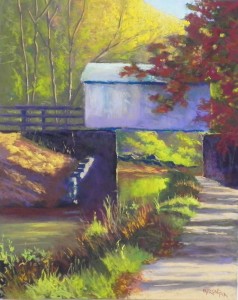
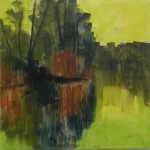
Lock and Tavern, Great Falls

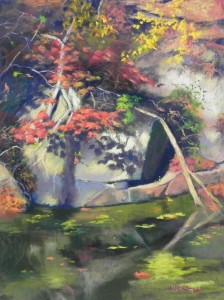
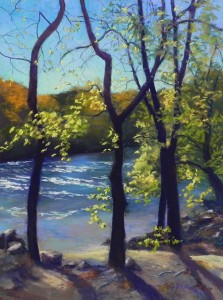
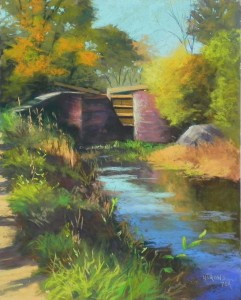
Lock and Tavern, Great Falls, 16" x 20", UART 320

Lock and Tavern, Great Falls, 16″ x 20″, UART 320

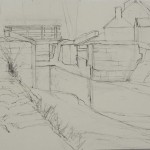
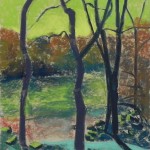
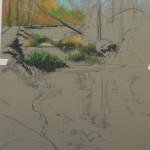
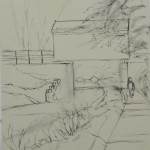
Initial drawing using graphite pencil

Initial drawing using graphite pencil

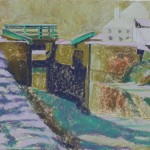
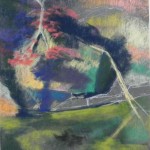
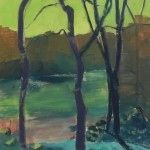
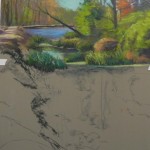
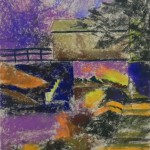
Underpainting, stage 1

Underpainting, stage 1

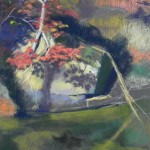
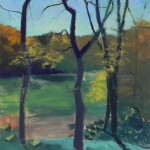
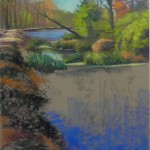
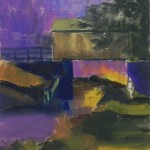
Underpainting, stage 2

Underpainting, stage 2

Completion of much of upper painting

Completion of much of upper painting

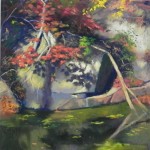
Completion of lower painting (minus path)

Completion of lower painting (minus path)

I spent several hours in the studio today finishing a painting I began several weeks ago.  This one took a lot of work!  A lot of drawing, a careful underpainting, and lots of color layering. I found i really needed to do it in small doses!  I’m working from a series of photos taken in 2015 in anticipation of a December show at Artists and Makers in Rockville. It’s going to feature my snow paintings and I have to do them when the weather is cold and I’m inspired!  But there’s nothing here to paint at the moment and who knows what the winter will bring.  So I found this photo which I never worked from and was delighted to see it!  I love the composition with the focus on the lock and the water and light leading back into the picture.  The tavern is there but not the star of the show (as in another painting I did in 2015).

The drawing was carefully done.  Then, I worked more slowly than normal on the underpainting as well, choosing colors that I thought would inspire me.  Two things about the underpainting. First, I used a very light blue and violet Caran d’ache for the buildings and the underpainting is pretty useless!  But it didn’t matter much.  Second, I was working with a friend and she loved the application of hard pastel in the background and suggested I skip the alcohol in this part. Good suggestion!  I left it and was very happy with it. Easy to go over it with Giraults and add the trees in, while retaining some of the different colors and textures of the initial layers.

The focus of the painting is on the lock and it’s light and shadow.  In the photo, the building had very distinct and dark windows and shutters. I knew I didn’t want that. So I put in some color and smudged it and kept it pretty suggestive. I used a light tuquoise for the building and then added some light pink into it. I was really happy with this!  (What I really like is that the buildings have the same colors as the snow in the foreground, giving some unity to the picture (I hope!))

The stone wall took work and I used a lot of Giraults to layer colors from cool violets and greens to warmer ochers and oranges.  I went back and forth a lot from warm to cool, seeing both in the same stones, along with cast shadows and light.  The reflections in the water were done with the same colors as above, but were smudged a bit and kept soft.

After completing the water, i put in the bushes and small tree along the left.  I decided to use a bright red orange in places to perk it up and was very happy with that.  Then I attacked the snow-covered tow path.  I began with a light whitish green Unison and a very light pink Ludwig in the back.  As I moved forward, I got out my Ludwig turquoises and used some darker blues.  I used a combination of blues and turquoise for the shadows and pink and organge for the sun-lit snow.

I knew from the beginning that I’d like this picture because I loved the composition.  I’m planning to revisit another painting I did and sold in 2015 in a larger version.  But first, I might do my pine tree again in a different color scheme!  We’ll see.

Happy winter to you all.


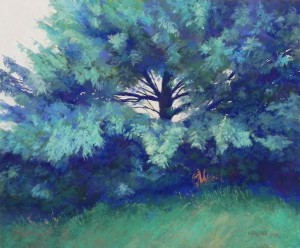
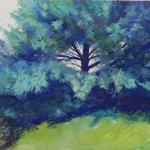
Turquoise Pine

Turquoise Pine, 20" x 24", pastel premiere white fine grit

Turquoise Pine, 20″ x 24″, pastel premiere white fine grit

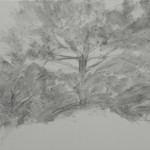
Initial drawing

Initial drawing

Drawing brushed with water

Drawing brushed with water

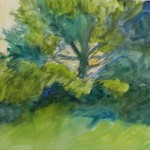
Watercolor underpainting

Watercolor underpainting

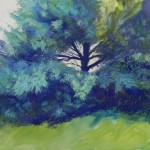
Partially done

Partially done

Trying out possibilities for the bottom

Trying out possibilities for the bottom

Happy New Year to my fellow artists.  I’ve really enjoyed some down time with a chance to paint and do a little teaching one-on-one.  So here is the first painting of 2020!  It’s a pine tree I saw in Iowa back in October.  I really liked the photo but not the colors and I decided to work from black and white and use the colors I like:  blues, blue greens, and turquoises. I asked for the Ludwig 30 turquoise set for Christmas and had to give it a try out!

The surface is an odd one. It’s Pastel Premiere very fine grit (600?) white paper that is mounted to gatorfoam.  I think someone gave me the paper.  I remembered that it doesn’t like alcohol so I had to use watercolor as an underpainting.  I began with a graphite stick and lightly roughed in the composition.  I then applied water with a brush to get a sense of the movement in the picture.  After that, I applied various green watercolors, with orange in the sky.  While not as dark as I would be going, the watercolor underpainting helped me with the general masses of dark and lights.  And I didn’t mind having a little showing through.

I used a variety of pastels, but basically all soft.  I did a lot of “hitting” the paper with Schmincke’s, Ludwigs, and Unisons.  I worked at trying to emulate the look of the needles on the branches but using the sides of the pastel in various diagonal strokes.  I used a few Giraults for filling in and smoothing over areas but basically, I kept to the softer pastels.  The paper has almost NO grit!!!  So you really have to apply the pastel with force.

I took my time with the tree. Something as complicated as this requires a lot of stepping away, sitting and looking, etc.  I wanted to be sure that the movement and composition worked.  The painting is bigger than the photo with more room on the right and at the bottom, so I had to be sure it was working.

My biggest challenge was what to do with the bottom of the painting. It was all grasses and quite detailed.  In the last image I’ve included, you can see various brown and green strokes in the lower left corner.  I REALLY disliked this!  Checked with my husband and YES, he disliked it too!  So I decided to simplify it and keep the color within the overall scheme.  I ended up getting out my boxes of green and turquoise Blue Earth pastels.  I used a combination of turquoises and the very grayed brown greens.  I liked this effect a lot!

Finally, I added the orange squiggle under the tree that was in the photo and seemed like a lovely touch.  I added small pieces of orange to the grasses at left as well, and a little darker in the shadows.

The sky is the one simple area, but not so simple. I used various light oranges and pinks, and settled on a little darker pinky orange.  It doesn’t show very well in the photo.

I LOVED painting this picture!  All of our paintings should give us joy!  I hope to find more subject matter that will make me feel as good.  I wish great paintings for you all in 2020.

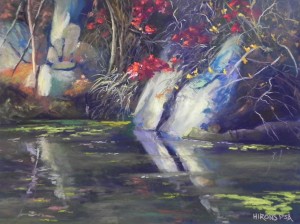
Leaf Shadows, C&O Canal

Leaf Shadows, C&O Canal, 14" x 11", Pastelmat "charcoal"

Leaf Shadows, C&O Canal, 16″ x 12″, Pastelmat “charcoal”

Stage 1

Stage 1

Stage 2

Stage 2

Stage 3

Stage 3

Here is maybe the last painting of the year (but maybe not!).  I sold the first painting that I did of the red leaves at the canal, so I decided to do another.  This one is more straight on and features the shadows of the leaves.  My friend Sandy pointed them out to me when I met her walking on the canal and I hope she won’t be upset that I’ve done them now twice–you should do them too, Sandy!

After the last one, where I had to do so much dark underpainting, I decided this time to try working on a dark surface.  I chose a “charcoal” sheet of Pastelmat. I love this surface, which is smooth but really rich and allows for real detail.  And I liked the color because it wasn’t completely black.  I really like beginning with my darks, so I have a hard time with black.  But having the relatively dark background helped a lot.

But I’m so used to doing underpaintings!  It was a bit of a challenge.  I began with a rough drawing using pastel pencil.  Then used the sides of hard pastels to lay in various colors.  After that, it was all Girault until the end.  Stage 1 is primarily the hard pastel. I used darker and cooler colors, in general, than what I was seeing.

In stage 2 I worked on the rock with leaves and shadows. I had a really hard time with the shadows but discovered something quite amazing.  As you can see from Stage 1, I started with a dark block of color.  But I found I really couldn’t use this to develop the reflections, so I went over it with light pastel (I may have brushed out the dark first).  Then, I added the dark shadows on top.  It worked beautifully!  This paper really IS amazing!

In Stage 3 I worked on the top of the painting and the reflections in the water, which were more difficult than some others I’ve done.  I used various greens and a little violet for the rock.  The top was rather complicated and difficult to make out.  There are several rocks covered with leaves and vines.  I tried to simplify it a bit and just lay in color, then added the crevices in the rocks and the yellow leaves over them.

My final applications were of soft pastel, using Schmincke reds in the leaves and greens in the water.

This was a more difficult picture for me as I don’t normally work in this way. But it was fun to challenge myself and good to try something different.  And I think that it was the appropriate choice for the subject matter, rather than an underpainting.

Happy New Years to you all!

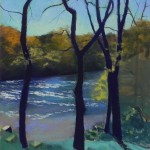
Dancing Trees on the Potomac

Dancing Trees on the Potomac, 24" x 18", UART 320

Dancing Trees on the Potomac, 24″ x 18″, UART 320

Underpainting, stage 1

Underpainting, stage 1

Underpainting after alcohol

Underpainting after alcohol

Dancing background started

Water initially completed

Water initially completed

Today was a wet and miserable day–the perfect day to spend with friends in the studio.  I began this painting two weeks ago today during an afternoon session and was happy to finally have time to get back to it.  This was a complicated painting!  A lot of layers of stuff going on here!  But I thought it was a happy picture, with the dark back-lit trees against a brilliant sky, the flowing river, and the lovely yellow fall leaves.

I began by drawing the trees and getting them in the position that I wanted, then drew in the big shapes of background island, water and foreground.  For the underpainting, I chose a darker yellow green than I’ve used lately and I really liked the way it looked with the warm orange-green trees on the island. I used the local color in the island as I knew that it was going to be complicated to go over it and didn’t want really odd colors.  I used darker green for the water and a warm reddish color where you can see the bottom of the river. I chose a turquoise to go under the browns at the bottom, as a cool under warm solution.

I began by painting the sky around the trees.  I started with warm blue greens and later added blue violets on top.  I used aqua at the bottom and then a light whitish yellow green to really give life to the sky just about the tree line.

I painted the tree trunks, using dark violet and dark red Ludwigs. (Much later, I lightened the parts of the trees above the tree line, but it’s hard to see in the image.  The trees would appear lighter there with so much light around them.).  I worked next on the trees on the island that form the backdrop. I used a combination of violets (at bottom), dark greens and oranges.  The orange on the far left is a Roche pastel that was amazingly soft when I applied it.

Next I did the water.  I used Giraults in grayed blues, blue greens and blue violets.  In order to get the colors around the trees I blended the first layers with my fingers and even used a rubber-tipped blender along the sides of the trees.  Then I used three different Art Spectrum soft tinted whites to put in the foam/highlights on the water.  For the area close to the shore, I used Girault warm neutrals with blues on top and went back and forth a few times.

The bottom was the most challenging part for me.  I went back and redrew the shadows and rocks with charcoal. I also changed the shadow on the lower mid-section. The two shadows were connected by a horizontal piece (as seen in underpainting) but I had no idea what was causing it and chose to leave it out.  Getting enough detail, the right values, and soft edges was a challenge and my friends gave me much-needed critiques along the way!  I was happy when I added the yellow color along the top of the dirt bank and let it lead into the water.

Finally, I added the smaller branches with a Girault and the leaves with various soft greens and yellows.

In my classes this winter, we’ll be discussing layering of pastel.  I realized that this painting required a different, more complex layering than what I’m going to teach–the layering of subject matter!  I hope it’s useful to see how I began and proceeded with the painting.  I never would have done a subject like this when I was first beginning!

Red Leaves and Rocks

Red Leaves and Rocks, 12 x 16, UART 400

Red Leaves and Rocks, 12 x 16, UART 400

Underpainting, stage 1

Underpainting, stage 1

Underpainting, stage 2

Underpainting, stage 2

Hello Friends. It’s a lovely sunny and warm day here in the DC area just before Thanksgiving. I’ve been continuing with my C&O Canal series and have another 24 x 18 on the easel to finish in December. I finished this 12 x 16 intimate rock scene this past week and wanted to share it with you.  With this painting, I made a decision: if the underpainting is going to be 80% or more of dark color–use dark paper!!!  Black UART would have been perfect for this painting. But I don’t generally like to work on black and thus, I have none of it.  So–lots of dark blue underpainting instead.

A challenge of this painting was to produce the stretch of light leading from the left over to the large rocks.  I didn’t really accomplish that with the underpainting, but paid a lot of attention to it as I was adding in the small twigs and such.

I really enjoyed doing the rocks on the left, playing with subtle colors of blues, violets, and peach colors.  I struggled with the color on the larger rocks, however.  I used a soft very light cool green and some yellow, along with violets and blue greens in the shadowed areas.

The photo is all pretty much grays with only a few very dark red leaves.  I added more–my prerogative and had fun adding in the little bright yellow leaves on the right.  As I’m writing this, I’m thinking that a floating red leaf might be a very nice addition.  Perhaps something to consider.

The water and reflections were more of a challenge than normal and I redid it several times, focusing on the rock reflections.  I used a lot of greens, from a very dark warm green and some Ludwig violet then various values of yellow green on the top.

I like this intimate view of rocks and autumn foliage. It’s a real change from the larger paintings with more distance and punch to them.  I’m looking for an opportunity to show these paintings. I’ve just been given a show at the Alexandria campus of NOVA (Northern Virginia Community Coll) in Sept. but not sure that’s the right venue.  We’ll see.

Meanwhile, I wish you all a lovely Thanksgiving with family, friends, or whoever!  We DO have much to be thankful for, despite the constant state of unease!!!

Autumn Light, C&O Canal

Autumn Light C&O Canal, 24" x 18", Pastel Premiere, Italian clay

Autumn Light C&O Canal, 24″ x 18″, Pastel Premiere, Italian clay

Stage 1

Stage 1

Stage 2, top part mostly done

Stage 2, top part mostly done

Stage 3, roughing in the side and water

Stage 3, roughing in the side and water

Just finished my third canal painting.  This one was not a demo.  I really liked the possibilities of the photo and decided that it warrented a larger format: 24″ x 18″.  I found a mounted board of the Pastel Premiere Italian Clay and decided to work on that.  So I didn’t do an underpainting, which posed its difficulties for me.  But it was kind of fun to just do a drawing, then begin at the top and work my way down.  I started with hard pastels and used them in the painting a lot more than I normally do.  I used a dark NuPastel “bottle green” to do much of the initial laying-in of the darks.  I tried to keep to the hard pastels, but fairly quickly switched to the Giraults.  But I left the hard pastels in my corn meal box and continued to use them.

I had a challenge with the orangey hay bale-looking bush in the middle. I started it out to big and prominent and after reworking it several times, decided to add more of the green bush on the right over it.  There are three areas of water here with narrow paths between the grasses that link them.  I added a little more light in the middle pool to make it clear that it was water.

Once I was happy enough with the top, I used hard pastels to rough in the bank on the left and then some of the water.  For the water, I started first with some of the reflections at the top, then decided I really needed to just get the blues in there. I loved the progression from the deep blue violet at the bottom to the warm aqua above.  I used a number of soft pastels to accomplish this.  Then went back to the reflections.   There were little ripples in the water so I used a number of small horizontal lines to try to indicate this.

The last step was the bank and leaves and stems going over the water.  I used greens, browns, and violets in the shadowed areas  to try to give them more interest and dimension.

I loved painting this!  It’s one of those happy paintings that you just love to do. The line of the bank leading up to the light on the water was such a great composition.  I wanted to take my time with it and enjoy doing it, which I did.  But I know that I really prefer to start with an underpainting.  I thought of doing a partial underpainting, but I it can be more difficult to work with, when some areas are covered and others are the color of the paper.  This approach worked well.


Light and Shadow, Great Falls (demo)

Light and Shadow, Great Falls, 20" x 16", UART 320

Light and Shadow, Great Falls, 20″ x 16″, UART 320

Drawing on pastel surface

Drawing on pastel surface

Underpainting, stage 1

Underpainting, stage 1

Underpainting, stage 2

Underpainting, stage 2

Today I did my second demo of the week for my Wednesday class.  It wasn’t easy!  But my class gave my many helpful suggestions and I was pretty happy by the time I finished it off to go home.  This picture has less light and sky than the first one and there is the odd covered bridge-like structure — which isn’t a bridge at all because it doesn’t go anywhere!  It seems to be a storage shed.  But anyone who had walked the towpath from Great Falls to Wide Water has seen it. What I really liked was the overall flow of the composition and the lovely warm color reflecting in the water under the “bridge”.

Looking at the initial drawing, you’ll see that I had a figure in there.  I left her in for a time, but decided to take her out. We weren’t sure if the proportions looked right and there was enough else going on.

The biggest challenge was what to do with the “bridge”, which in the photo was almost completely uncovered by trees. There was a a tree to the right but not as large as what I created.  My initial thought was to try to add more cast shadows. The light is coming from the right (west).  But when I enlarged the tree to cover up more of the bridge, it looked much larger, and thus, much closer, and so–no cast shadows.  But I liked it nonetheless.  That was the one major compositional change that I made.

Underpainting colors–the biggest question I get.  I knew I was going to be using yellows in the trees at top and that I’d be putting violets and blues on the “bridge”, so I went with violets under the background trees.  I brought this color down into the background as well and used it for the color of the water in the foreground.  For the bridge, I used a warm “almond” color with browns, using a warm-under-cool approach.  But for everything else, I used warm under warm and cool under cool.  My reasoning is that the bridge is a large, flat structure, over which it is easy to apply the colors.  But everything else is much more complicated!  Thus, by using warms under warms and cools under cools, I can see where the warm areas of the composition will be after the alcohol is applied.  In all, I used various violets, browns, greens and some orange.

There were a number of struggles in the painting.  Going too bright immediately in the background was a problem.  The “stepped” wall in the mid section was also a challenge as the light areas seem to jump out too much.  I finally used a darker neutral to make it work.  The walls under the bridge were begun with “eggplant”, over which I applied majenta, warm brown, green, and finally dark grayed blue. The final grayed color was a little lighter and set it back where it belonged!  (Thank you Katherine!)  I used reds and reddish browns in the large tree at right, then added several greens into it.

The final work was down on the towpath and the grasses in the lower left.  For the towpath, I started with two colors of light and dark to just place the shadows.  Then I used various violets and browns over them to break them up and soften.  I added some clumps of leaves along the edge and various lights and darks.  For the grasses, I used a mix of pastels, including going back to the hard pastels, which was kind of fun!

I’ve wanted to paint this scene for some time and I’ve finally done it.  Not sure I will again, but I think this is the best time for it, given the lovely color around it.  And–it’s one of the places on the canal that still has water!

Lock 17, Great Falls (class demo)

Lock 17, Great Falls, 20" x 16" UART 320

Lock 17, Great Falls, 20″ x 16″ UART 320

Underpainting, stage 1

Underpainting, stage 1

Underpainting, stage 2

Underpainting, stage 2

Painting at the end of the demo

Painting at the end of the demo

Reference photo

Reference photo

Hello Friends. I’ve had a number of walks lately on the C&O Canal and plan to do a series of paintings of it.  It’s fall here, finally, but the color is still wanting. However, the sunlight has been gorgeous.  Today I did an all-class demo and finished the painting during the afternoon. I’ll be doing another on Wednesday and will also do a demo for my Saturday class. I also hope to just paint from my many pictures.

This subject is one I’ve done before. It’s my favorite lock by far, and there is still a little water in it (but not as much as I’ve given it).  (The canal has been drained pretty much and some parts are nothing but grass.) I’m including the reference photo so you can see what it looked like.

For the underpainting, I decided to use greens under the greens and warmer colors that would go on top.  It worked pretty well.  I used oranges under the brighter greens and turquoise under the towpath and rock.

The tree in the upper left went very quickly. I used a several Roche oranges and then filled in behind with greens and some sky holes.  The bush on the right, however, was a real challenge. I had planned to make it a brighter yellow, but when I tried to do it it didn’t look good at all. I got out my Blue Earth lemon set and used the wide variety of warm greens in it to get the shape of the bush. I then added yellow greens some orange and some lighter yellow near the sky.  Much happier with it.
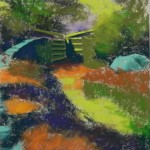
The lock itself had to be redrawn.  I hadn’t spent enough time on the structure and angle of the cross pieces.  But finally got it where down.  Then we all felt that the tow path on the upper left was too hightened and accentuated.  So I raised it and covered some of it with grasses.

The water and reflections and the lower part of the painting were a challenge. While there is a little water in the photo, much of it is mud!!!  I put in the reflections of the trees and bushes in the upper right, then added various blues over the reflections.  But when I went to do the grasses in the lower right, I realized that the very large dark shadow that was in the photo didn’t make sense if there was water.  So I added more water, all the way to the bottom right, then made the darker area into grasses of the bank (or at least that’s what I tried to do!).

Anyway, I’m pretty happy with this painting and look forward to the next set of challenges!


Back to Painting! RAL Demo

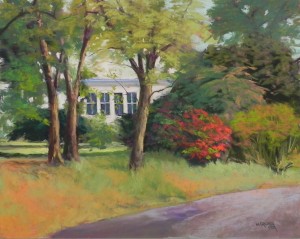
House on Sugarland Road, 16" x 20", UART 320

House on Sugarland Road, 16″ x 20″, UART 320

Reference photo

Reference photo

Painting at end of demo

Painting at end of demo

Hello Friends. I haven’t posted in some time. We had a trip in August then things got screwed up at my studio and I just haven’t felt much like painting.  But on Oct. 3 I had to do a demonstration for the Rockville Art League.  I began several weeks ahead of time with a landscape I had taken in early Sept. I did a 14 x 11 color study. It was OK.  But when I went to draw it on the 16 x 20 board, I hated the composition and I had NO idea where I was going with the color.  NOT SO GOOD!  On Oct. 1 I took a drive out to our agricultural preserve and found this scene right where I parked my car!  The photo doesn’t look like a lot, but I could envision making the large dark bush in the foreground red, and making some other changes. So I had to go with it.

The demo was in the evening and I had about an hour and a half. So I worked REALLY fast while talking A LOT. I had the drawing done but had to do the underpainting.  I don’t have an image of it but I used yellow green in the sky and under the house, purple under the trees, and reds and greens.  I was envisioning this being a red/green complementary painting.

I decided that I had to make some changes from the photo. First, I wanted to get rid of the large dark tree in the upper right corner and replace it with something softer and more suggestive.   Secondly, there were three trees at the site all evenly spaced. I decided to put two trees together and bring the third one down into the foreground.  I also decided to try to make the bush/tree above the red bush (in painting) into more of a dogwood-looking tree.  I also changed the house–unintentionally!  The porch with windows became much larger in my painting and the upper part smaller but I liked it better.

At the demo, it started to come alive when I added oranges and greens to the foreground grassy bank.  But the upper part of the picture looked pretty dreadful and the windows were glaring.  I looked at this picture through all of last week’s classes and couldn’t wait to get to it this afternoon. But I wasn’t sure whether I’d be able to pull it off.  (You know how it is when you haven’t painted in awhile.  Can I still do this???)  I started with the house, putting a light pink over it all and not worrying about varying it.  Then I worked on the windows to soften them and added more foliage to left side. I did a lot of work on the trees.  Then moved over to the right side. I brushed out the bush above the red bush and went over it with horizontal strokes of greens and pinks.  I also brushed out the bush to the right of the red bush and started it with a dark brown, adding lighter strokes for the small branches.  I added the darker bush above, based on the photo, then the tree.  I purposely left it fairly flat, but added a blue green over a green to push it back.

The red bush was always meant to be the center of interest, so I added some more soft Schmincke reds then a more orangy red and some brighter greens until I was happy.  Then I tackled the foreground. I didn’t want to lose the sense of what I had put in but I knew it needed to be more subtle.  Then, I suddenly realized there was a serious problem with my composition!  I had added shadows coming from the trees to the right, based on what I saw in the photo.  However, the light was coming from the upper right!  So those had to go.  I did more work on the lawn in background, adding some brighter greens and shadows that I hope lead the eye to the bush and speak to the color in front of it.

Finally, the road.  I added a dark redder violet, then a grayed green over that, then some light violet.

I’m really happy with this picture!  I like the way the orange in the foreground leads the eye to and speaks to the reds in the bush. And I like my bunch of foliage on the right.  The house is there to give it interest but it’s not really about the house.

Now I’m free to play!  I will do two demos for my classes in November, but I hope to do some abstracted landscapes or something to just keep me working.  I hope to move my studio to a new location in December. But nothing is certain at the moment so it’s kind of a difficult time.  But I hope the rest of you are enjoying the fall.
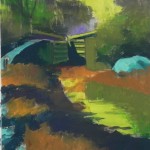
 

Autumn Valentine

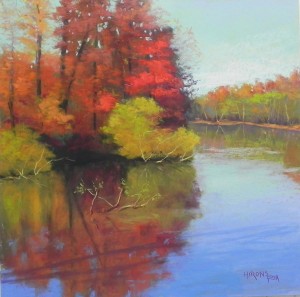
Autumn Valentine 20 x 20, UART 320

Autumn Valentine 20 x 20, UART 320

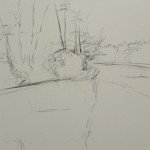
Initial drawing on the board

Initial drawing on the board

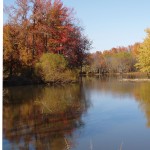
Reference photo

Reference photo

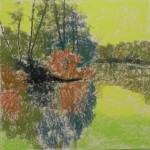
Underpainting, stage 1

Underpainting, stage 1

Underpainting with Gamsol

Underpainting with Gamsol

I spent what will probably be my last painting day in my current studio with four dear friends, all painting in pastel.  The painting is a fall painting that I’m going to put in a 20 x 20 gold leaf frame that I spent a fortune on back in 2013.  I wanted to do a fall painting to put in it.  And this experience will also help me with my upcoming demo at the Rockville Art League on Oct. 3rd, which will be a 20 x 16 from the same area and time.  The river or pond is in Maryland somewhere near Blackwater National Wildlife Refuge. I took the picture a long time ago.

I don’t always like painting out of season, but after all the greens of my last painting, this one was fun!  I’m including the reference photo so you can see what it looked like. I was concerned about the composition–breaking the picture in half both ways!  I tried to give more of an angle to the base of the trees and I added a second green bush to cut down the area of dark.  I also moved the overall shape of the trees to the right so it wouldn’t cut the painting in half from top to bottom.  The drawing shows this, I think.

For the underpainting, I kept it pretty simple–a truly big shape underpainting!  I used yellow greens and a darker green for sky and water then greens and browns for under the trees and reflections.  This is my standard approach to fall. You have to do something to keep the reds and oranges from being overwhelming.  I used a mid-toned warm green and a darker cool green, which helped differentiate the masses.  I decided to use Gamsol again, simply because it’s still on my cart in the studio.  Found I needed to use the hair dryer however to get it dry!
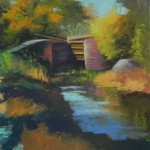
I used Giraults and some Henri Roches to begin with and found they layered beautifully on the surface, with lots of room to add more.  For the brighter reds on the right, I used Schminckes and kept it to a fairly simple shape so as to have an impact.

The sky began as all aquas but I added some blue at the top and went to darker true blues in the water.  The sprig of sticks coming up through the water was right below the greenish bush in the photo. I decided to keep it but moved it more to the left for balance.  I eliminated a large yellow tree on the right and just went with the background trees.  The last thing I did was to add the shadow of a tree to the bottom of the picture.  I really liked the diagonal lines and the way these broke up the large shape of reflection and tied the reflections to the water.

So a productive and happy day, but sad to say goodbye to my space.  In Sept. (I hope) we’ll be moving to a new cleaner building, closer to my home.  All the artists will be on one floor and there is a lovely large, sunlit classroom. So it’s a real plus for us.  But my studio there will be smaller.  Sigh!

Meanwhile, John and I will be taking off on Thursday for a Viking cruise to the Baltic Sea, Oslo to Stockholm with stops in Copenhagen, Germany, Poland, Tallinn (Estonia), St. Petersburg, and Helsinki!  Something different!!!  Hope you all have a good month of August.