Gull on Rocks (Video)

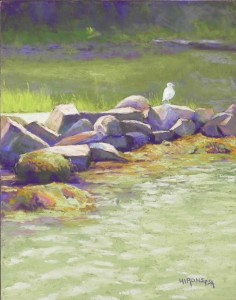
Gull on Rocks, 14" x 11", Uart 320

Gull on Rocks, 14″ x 11″, Uart 320

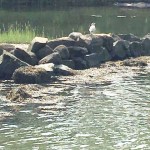
Original photo image

Original photo image

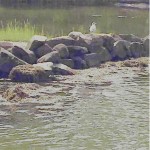
Printed photo image

Printed photo image

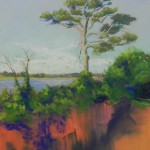
Today we finished filming the second of two videos for this small painting.  The first video is the underpainting. Today’s is the painting itself.  Unfortunately, half way through, the camera ran out of room so we lost the part on painting the rocks!  However, I still think it’s pretty good.  Because I did this as a video, I don’t have all the images for the underpainting, but they’ll be on youtube in a week or so.

I took this picture in 2018 when John and I were visiting Massachusetts. This is on the Slocum River in N. Dartmouth in a nature preserve where we walked with my friend Sarah Brown.  I’ve always like the compostion but the dull and dark grays and greens discouraged me from doing it.  However, it seemed like a good subject for a demo so I lightened the picture a little and printed it out.  The first photo is the lightened version. The second is a picture of my picture!  I forgot that my new Epson print lightens everything when it prints.  As a result, I got a really light image!  But also a much more colorful one.  In the printed picture I could see violets and magentas and all sorts of colors that weren’t orginally visible.  So I was much more inspired to paint it.

I decided that rather than being an all green picture, this would be a green-violet-orange triad.  I figured that the seaweed along the rocks could be more orange than it appeared and would add some nice balance to the picture.  In the underpainting, I used mainly greens, violets and browns, with a nice reddish orangy brown in the water behind the bird.

I kept the upper half very abstract, using just violets and greens, smooshed together.  For the rocks I used violets, greens, warm neutrals, and some reddish colors as well.  The seaweed area was the most challenging, primarily because the color in the photo were so dull and light.  I began it with a Roche warm yellow orange that blocked in the area beautifully.  I added greens and violets on top and some darker hints of violet below.  Im happy with the results.

For the water, I used two shades of green then two shades of lighter green for the light on the ripples.  Rather than following the pattern in the photo, I used an arcing pattern from lower right over to submerged rock and then to the upper right towards the bird.

I really enjoyed doing this painting, even though I had initial qualms of doing it for “the world”–not that that many people will view it, of course–but, it will be out there!

Not sure when it will be published but hopefully during the first week or July.

Happy Fourth.  Don’t go to large parties. Stay safe. Stay sane!!!


Westport Farm

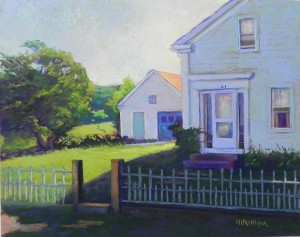
Westport Farm, 16" x 20", UART 320

Westport Farm, 16″ x 20″, UART 320

Underpainting, stage 1

Underpainting, stage 1

Underpainting with alcohol

Underpainting with alcohol

I’ve been searching through my files of pictures from Mattapoisett and the towns around there.  One of my favorite places is Westport, MA.  It’s an old town of rolling farmland and old farmhouses that hasnt’ changed a whole lot.  I found this picture of light and shadow and decided I really wanted to paint it.  It’s a pretty cool picture overall so I knew I wanted to start with a warm underpainting and I had a good time with it. Kind of wild! Used the same greens from the last pianting and liked them.

I wanted the sky to be soft and cool at the left, warm at the right.  The soft oranges and yellows that represent light kind of look like clouds or fog, but that’s OK.  Could be sunlit fog–it’s near the water.

The tree was not easy.  I used nothing but soft pastels in it (no Giraults).  I started with some deep blue in the shadows but it stood out too much and I later replaced it with red violet and green.  The garage is done with a little warmer violet, while the house is all blues. I used a warm orange brown Girault to add the sense of peeling paint in some areas, which was quite visible in the photo.

The picture is a challenge due to the contrast of light and shadow.  The green grasses in front of the house are really dark. I’ve tried to indicate some stones set into the grass that would have been an entry to the door at one time. I doubt that it’s used much now.  I added some red violet to the green where it meets the yellow green.

I wasn’t sure what I was going to do about the fence but I knew I had to put something in. In the end, I chose to put it in as a I saw it with the two levels of vertical pieces.  Kind of interesting!

I really enjoyed doing the painting and could picture being there on the road to Westport Harbor. I took the picture after a lovely time painting down by the water with friends Sarah Brown and Janet Gendreau.

I hope you are staying well and enjoying our lovely weather before it gets too hot.

Not sure what’s up next!

Mattapoisett Blues

Mattapoisett Blues, 16" x 20", UART 320

Mattapoisett Blues, 16″ x 20″, UART 320

Underpainting, initial colors

Underpainting, initial colors

Underpainting, more color added

Underpainting, more color added

Underpainting with alcohol

Underpainting with alcohol

Painting in process

Painting in process

Painting with too much yellow!

Painting with too much yellow!

I finally got to paint this past week.  It’s been awhile. I’ve been focused on art and music videos!  TOO MUCH!!!  My last art video is called “Color Choices for a Useful Underpainting”.  It’s currently being edited by my friend,Helen Wood.  It will be a lot nicer than the others I’ve produced so far. We are both learning a lot.
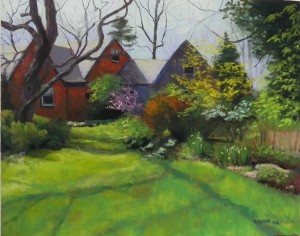
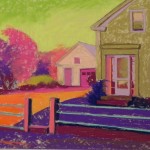
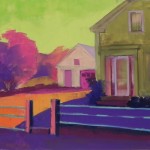
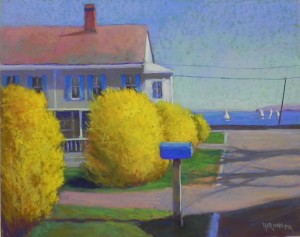
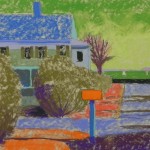
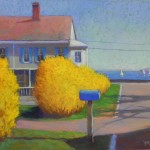
So one of the photos I used in the video is a picture of Mattapoisett in spring of 2018.  I loved the blue mail box, along with the blue shutters and the boats in the blue water.  But it was never the perfect composition and that’s why I hadn’t painted it (I think I’m getting desparate!).  There is a big tree in the photo, right behind the mail box and the forsythia is all bare brown bushes.  I knew when I took the photo that it had possibilities.  But I wasn’t sure what to do with the tree. In my sketch, I tried moving it to the front of the house, nearer the harbor.  I originally drew it that way on the board, but decided it was too busy.  Then I thought I’d make it a lot smaller. You’ll see it in the underpainting.  I hated it!  Thank goodness we can brush off pastel.

I gave a lot of thought to this painting and the mood I wanted to create. I wanted it to have a soft, impressionist look and I chose to use smaller strokes of color.  But I also realized that without the trees, it had more of a bare, stark appearance that reminded me of Hopper–never a bad thing!  When I decided to take out the big tree, my original plan was to add a tree branch coming over the roof from the left to break it up. But I soon realized that I didn’t want anything there at all. Color variation would be enough.

So, the color choices. In the video, I say that there are only three color choices:  opposites on the color wheel (complements and near complements), colors on the same side (analogous), and local color.  And I came up with some new terminology of assessing your subject matter for “challenges” and “possibilities.”  Or, what parts will be difficult to paint, which parts are rather boring but easier to paint.  Perhaps using analogous or local color in the challenging areas will work better, while large boring areas can benefit from opposite colors.   So, in this underpainting I actually used them all.  And I also decided that because I wanted a soft look that I didn’t want a lot of stark color (except that orange!) in the underpainting and I added more colors to the initial layer.

The challenging areas were the sky (when I though there would be a tree) and the bushes.  For the sky, I used a warm, medium green and a lighter yellow green. I’ve never used the medium warm green before but it worked really nicely.  Where it showed through it was fine.  For the the bushes, I decided to use the color that I saw in the photo of the bare branches–so I was using the local color, knowing that I’d be putting yellow on over it. I used several of the Caran d’ache olive browns.  The roof and the road were “possibilties”–rather boring areas.  I chose to use cool blue with some red added to it for the roof, and a combination of cool colors for the road, knowing it would end up warm.  For the mail box, I used the actual complement and used other oranges in the grasses.  I was pleased with my choices on this one and thought they enabled me to do the painting quite nicely.

So that was the easy part!  Those bushes were a real problem.  Having chopped down the tree, I had more room for forsythia and it became a large yellow blob with too much orange in it.  I sent the image to my students for comments and they agreed with me.  After reading one comment I knew what I’d do–break up the group of bushes with another walkway nearer the front. This enabled me to add more darks and shaping to the bushes and I also used a lot more yellow greens in them to tone down the orange.

I decided to add the telephone poll and wires and am glad I did.  It adds a little more interest to the background.  I made up the shadows of the trees on the road but not the large dark shadow of a house.

Back to my original plan to paint it more impressionistically. I paid alot of attention to this in the sky and the house.  For the roof, I used quite a few colors, combining oranges and reds and adding some blue green on in places to give it more interest.  For the house itself, I combined complements to create the shadows and kept the strokes and edges loose.  I’m happy with this approach and will use it in my next painting of Mattapoisett.  I’m visiting virtually this year!

Isolation/Hope (Norway) and a new surface!

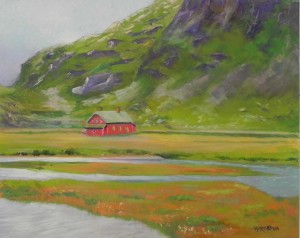
Isolation/Hope (Norway), 16" x 20", Lux Archival

Isolation/Hope (Norway), 16″ x 20″, Lux Archival

Ink wash underpainting

Ink wash underpainting

Detail of mountains

Detail of mountains

Hello Friends. I hope you are doing OK.  Did you see my last Youtube video on Making Initial Decisions?   I plan to do another one soon on creating “useful” underpaintings.

But in the meantime, I’ve just finished a painting on the new Lux Archival surface, which arrived from Dakota this past week.  It’s quite nice, although I scrapped the first painting I tried. (Might try hosing it down outside!). The paper has a nice backing and stays absolutely flat, which is really lovely.  It’s expensive ($10.75 a sheet) and only comes in 8 x 10 and 16 x 20 or a roll. But it’s a lot cheaper than a $20 mounted 16 x 20 UART board.

For the first painting (the photo and drawing for which are featured in my video), I decided to do a regular hard pastel and alcohol underpainting with the beautiful new Caran d’ache hard pastels that came along with the paper in my order.  Then I began with soft pastels. It wasn’t good!  I felt like I was filling in the tooth of the paper too soon. And, despite all of my “initial decisions”, the composition just wasn’t interesting enough!  So I decided to work on this picture from our August 2019 trip to Scandinavia and the Baltic.  We began in Oslo and took the scenic train to Bergen. At the top of the mountain range was this house, looking really lonely. I wondered WHO owns it?  I’ve always thought about doing it, but now seemed like the perfect time.

I would have done a water color underpainting, but realized I hadn’t retrieved them from my other studio. But I had some bottles of ink that I’d tried out for my class some years ago. So I used those instead. Worked fine and no buckling whatsoever!

Next, I decided that at least to begin with, I would stick to hard pastels and Giraults and that worked quite well.  I used my new set of blue/violet Giraults in the sky and used a combination of hard and Girault for the background mountain.  That was definitely the hard part!  Particularly the right side, where there were gravel banks coming down the hill.  I had to keep the values fairly muted so they didn’t stand out.

For the building, I started it with hard pastels using a cherry red and a lighter pinkish red.  The color of the building is really cherry red–you see it throughout Norway (what I saw of it anyway).  Today, when I went back to it, I decided I didn’t like it . The detail was too perfect!  And it stood out too much compared with all the oranges in the foreground. So I used a warmer Ludwig red and lightly went over it. I also used a hard Caran d’ache olive brown to soften the entire building.  Was much happier with it.

I decided to use more soft pastels in the foreground and it worked well. I think that slowly building up is the way to go with this paper. But others might disagree.

Finally, I added sunlight in the water and some yellow peaking over the mountain in the background.  A small sign of hope!  This wasn’t in the photo, but I had to add it!


Lonesome Pine (Chincoteague)

Lonesome Pine (Chincoteague), 14" x 11", UART 320

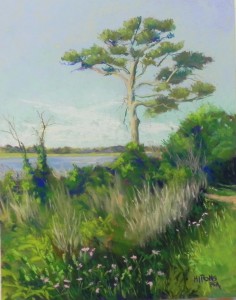
Lonesome Pine (Chincoteague), 14″ x 11″, UART 320

NuPastels and Carandache hard pastel sticks used for underpainting

NuPastels and Carandache hard pastel sticks used for underpainting

Underpainting, stage 1

Underpainting, stage 1

Underpainting after alcohol applied

Underpainting after alcohol applied

LP Sky

Painting at start of video

Painting at start of video

Yesterday I did a small 14 x 11 painting and a video on how to paint foregrounds.  I went once more to my stash of images from 1.5 days in Chincoteague in 2015!  Found a good image with a lot of foreground, did some preliminary sketches, and changed the orientation to vertical.  Since the demo was about the foreground, I did the underpainting and then painted in the sky, tree and midground.  You can see the video at:  https://www.youtube.com/watch?v=XTBbvt5Deqs&t=622s

Because the painting would be cool–all blues and greens, I instinctively chose warm colors for the the underpainting, using a mix of NuPastels and some of my favorite Caran d’ache colors.  Some of this can still be seen poking through the painting, but most of it got covered!

For the sky, I determined that the sun is coming from the left, so I made the upper right corner slightly darker.  I used two close values of blue Ludwig pastels to paint the top half, then chose two turquoises for the bottom.  I waited until I was working on the tree to finish the small pieces around the branches.  Given how much sky there is, I decided that I needed some clouds.  These were added with a soft very light white-orange.

The background trees were three values of fairly light greens–grayed and brownish with a violet lightly brushed over to cool it down.  There is warm green below the distant trees. I added it and then added a duller stick over, again to keep it from being to bright–way back there in the distance!

For the tree, I took my time, using a blue and dark blue green Girault, along with various other mid-toned greens.  Got into darker and brighter greens for the midground and chose colors to be used in the video.

Several of my students requested that I do a demo of a foreground.  It’s daunting to some because it’s where all the detail is. I have to get up the courage and just go for it!  I said in the video that it’s something of a performance, but one I generally like to do for myself!  In thinking about this demo, I realized that there are the challenges of detail and not overdoing it.  But that it also provides a chance to use softer pastels and expressive mark-making.  You have to set yourself up with a good underpainting, so the composition and values are there.  Then, you can go to town and have a good time!  I think this worked pretty well.

I’m getting better at the videos. This is my fourth.  I now have a channel on Youtube and hope to make them more advanced and professional as I go along.  I AM something of a performer so it’s not completely alien to me!  After teaching for more than 15 years, I just pretend that my class is sitting there with me and I talk to them.  But now I can talk to whoever wants to listen!!!
I need to get a mike and maybe we’ll get a videocamera so John can tape them and zoom in on the demo.  I’m also going to explore ways of giving classes online.  I’m not there yet!  I have a large list of Maryland students. But, of course, anyone could participate when it’s online!  Will have to see how things go with the virus and whether I think I can get back to in-person teaching or not.  IF not, then I will definintely be exploring the best ways to teach others from home.  If you have experience or are interested, let me know!
 

John 2020 (Portrait of my husband)

John 2020, 20" x 16", Pastel Premiere

John 2020, 20″ x 16″, Pastel Premiere

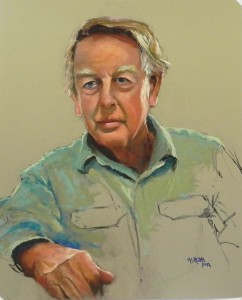
After being able to successfully paint me, I HAD to try to paint John!  His 80th birthday is May 17th so I thought this would be a fitting gift.  I started with a graphite drawing, that was pretty bad, then moved on to the charcoal on another 16 x 20 sheet of Pastel Premiere Italian Clay.  I highly recommend this surface for portraits.  It’s got just the right color and texture. I don’t think I’d use anything else.  Can’t imagine doing an underapainting.

My first challenge was to get a photo of him. He tends to pose or smile when he knows I’m filming him.  One evening after dinner, he was sitting at the table with light coming in from windows on either side of him.  I got the Ipad and started shooting and found a picture I really liked.  No smile (or teeth, thank god) but a nice picture that reveals his kindness.  For those of you who don’t know him, he has a lovely sense of humor and has been very easy to live with during “these difficult times”.  So I wanted to capture a little of that.

I didn’t take any pictures of the painting in process as I was not happy most of the time.  I never got the drawing as good as I did on my own portrait.  And when I started applying the color, I thought it looked awful!  However, I persisted!!!  I don’t know how to accurately measure the face so I relied on observation primarily.  (I just read on the internet about the basic proportions, which would have been a help. Fortunately, everything seems to line up with what I read!)

I had the most problem with the shape of the face and the position of the mouth and chin. His face is long and thin but with a few jowls, as you can see.  I first made the nose a little too long, which then meant that the mouth was off.  I had planned not to show the picture to John until his birthday, but yesterday I was desparate and asked him to take a look. He immediately noted that the mouth wasn’t in the right place.  When I shortened the nose, it left too much distance between the nose and the mouth. I was amazed, but then I guess he DOES know his own face!

I knew I wanted to include his hand and i was concerned (and still am) that it might be too small.  I had drawn it larger but the little finger was going to be really fat!  I DO like having the hand in there, more completely painted with the suggestion of the shirt.  He as wearing a beige shirt–not my favorite color!  So I used a number of cool and warm grayed greens that I thought would work well with the reddish-orange tones in the face and hand.  Finally I took the dark blue that I had used in his eyes and applied it to the shirt as well.  I was pretty happy with this and decided to quit!

I put it on Facebook and people are now asking me if I’ll do portraits.  I’ve watched the pros like Christine Swann and Diane Rappisi do portraits and i know that they work very differently from me.  I don’t think this is my forte and I wonder if I could really paint someone I know not at all from a photograph.  It wouldn’t be the same.  While I was painting this I would suddenly study John’s nose or mouth when sitting across from him!  Hard to do that with someone who isn’t here.

But it’s been a great challenge and I won’t say that I won’t give it a try.  After all, as I told one person–it’s really all about value shapes!

I hope you are doing OK out there.  Let’s hope we get a break sometime soon and have a few months of more normal living before fall and winter and who knows what comes!  Happy painting.

Marsh Painting for Video

Initial drawing on board

Initial drawing on board

Painting at end of video

Painting at end of video

Background added

Background added

Beginning grasses

Beginning grasses

Water and foreground added initially

Water and foreground added initially

Hi Friends.  I’ve had several things “hanging over me” lately.  One is to get a good enough video of the Bach fugue I’ve been working on for over a year to share with my piano group.  The second is to provide a short video for District Arts Gallery in Frederick.  It’s a wonderful place and I said immediately that I’d do it!  Had no idea HOW I would do it.

I started by creating short teaching videos for my students and ended up creating a YouTube channel!  It’s not impressive but there are two short videos on there under my name.  For the gallery video, I wanted something short and to the point and decided to discuss and demo an underpainting.  I chose a scene from the Eastern Shore for it’s fairly straightfoward shapes and printed it out in B&W.

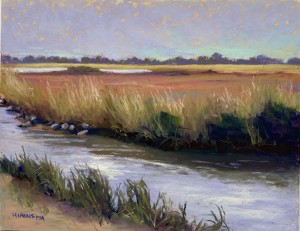
For the underpainting, I chose some oranges, orangey browns and violets–colors I really like!  I added the alcohol to the sky horizontally, then  moved from the tree line down using vertical strokes.  This produced a really interesting, colorful, very loose underpainting on which to work.

I worked solely from the B&W photo. The color image wasn’t terribly inspiring so I just decided to use my intuition and it worked pretty well.  For the sky, I lightly brushed a Girault violet over the orange underpainting and something in the texture of the paper left a lot of the orange showing through.  It looked like cirrus clouds!  I really liked this effect but wasn’t sure what to do with it.  I had in mind adding some aqua at the bottom of the sky to indicate a break in the clouds, which I did.  But I ended up leaving some of the orange showing through and I like it.

I started with a violet for the distant trees and later added a dull gray green over them.  Then used a combination of yellow ochres and reddish browns for the flat grassy marsh.  For the tall grasses, I used a comination of greens, browns, violets, ochre and pink.

When I got to the water, I could see that there was some real brightness in it. I put in the green/brown reflections first, then used three different values of violet to lay in the water horizontally.  I finished this with a light yellow Terry Ludwig pastel to provide sunlight hitting the water.  (There may be clouds in the background but there’s nothing to say that there couldn’t a little sun coming through overhead!)  I really liked the effect of this.  I next added the lower grasses and dirt and indicated some shadow under the grasses.  I brought some magenta into the lower grasses to help tie them to the reds above, and I added the same color to the dark green bushes (not sure you can see it).

This was a fun painting to do. Much easier than a self portrait!  Or even my dancing cloud.  But it posed its own problems and I spent a wonderful afternoon painting after dealing with the frustrations of technology!  (And–this morning i produced the first complete recording of the fugue.  I’m making progress!)

Stay well.

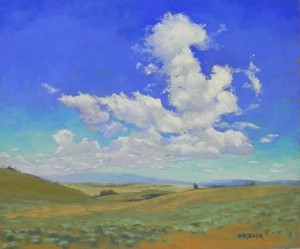
Cloudy Day Marsh, 11" x 14", UART 320

Cloudy Day Marsh, 11″ x 14″, UART 320

Happy Dancing Cloud

Happy Dancing Cloud, 20" x 24", Pastel Premiere "Italian clay"

Happy Dancing Cloud, 20″ x 24″, Pastel Premiere “Italian clay”

Initial lay in of sky

Initial lay in of sky

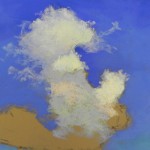
Detail of colors in cloud

Detail of colors in cloud

Hi Friends.  How are you all doing?  I’m holding out here with John, doing a painting a week, teaching, practicing piano, and trying to do some videos.  I’ve done two short ones that aren’t great!  But it’s a start. They are on Youtube under my name.

After doing the self portrait (which was revised since I posted it), I wanted to do something a little less demanding.  I had been looking at this cloud picture for some time.  We took this in Wyoming on a day when we were driving from Laramie to Boulder Heights to see our friends Ben and Susan Foster.  So I was a little concerned with time.  We decided to take a shortcut (it looked great on the map!) and ended up on a dirt path driving through open range land with pronghorns leaping about!  I’d never seen them but somehow I knew exactly what they were.  It would have been a rather happy occasion if we hadn’t been so lost!  But finally, I saw a tiny truck on the horizon, indicating a highway up ahead and sure enough, we got back to civilization.  But not before i took this photo from the car window.  I just loved this cloud and I’ve thought about painting it since 2017.

I would like to have done an underpainting, but i don’t have 20 x 24 UART and I wanted this to be a big picture.  So it’s on Pastel Premiere, Italian clay.  It’s really a lovely surface and not that hard to cover.  Nevertheless, it took some doing around the edges.

I did a color study of various Ludwig blues to get the right ones. I wanted a fairly dark and pretty pure blue sky with greens at the bottom fading off.  I ended up using a combination of Ludwig and Girault.  Ludwigs for the inital layin of color and the Giraults to smooth it out and fill in the cracks.  Worked well.  Later in the process, I added a soft very light red violet at the bottom beginning on the left and dragging some of it over to the right.

For the clouds, I began at the top and worked down. Here’s where I could have benefitted from an underpainting.  I got too detailed too soon!  I used a wide variety of light Ludwigs: violets, blue violets, greens, turquoises, pinks, oranges, and finally yellow.  It may not look this colorful  but all of these colors are there. However, it’s a very sunny day cloud so it’s all fairly light.  I also added some light warm color at the bottoms to indicate the reflection of the land below.

For the land below, I used a variety of soft warms–odd greens, brownish oranges, etc.  This is all very dry country so it has to be warm in tone.  I used the varying colors to create bands and shapes of colors to given the ground more interest.  In the foreground, I had to have a little more detail.  I first added some dark cool green under the grasses with a brighter orange around them in the very bottom.  Today, when I looked at it, I was  concerned about the completely different colors in the top and bottom.  So I added some of the blue sky color Girault to the darks areas under the grasses and also signed my name with a dark blue pencil.  It’s interesting how often the choice of color in the signature helps balance the colors in the painting!

This painting was really fun to do and it’s a cheery subject and a remembrance from a very happy day.  We had a wonderful time at the Fosters and were lucky to see them again last year.

A Self Portrait!

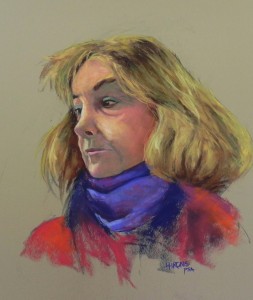
Self Portrait 2020, 20" x 16", Pastel Premiere Italian clay

Self Portrait 2020, 20″ x 16″, Pastel Premiere Italian clay

Charcoal drawing

Charcoal drawing

First stages with color

First stages with color

Adding the hair

Adding the hair

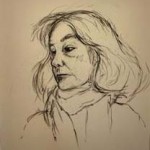
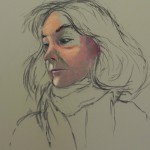
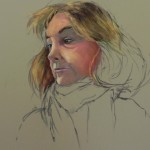
Hello Friends. I trust you are all still well.  I’ve been keeping in touch with the 20+ students that I had over the winter and several of them did really nice self portraits. So I decided it was time for me to take the challenge.  I have never done a portrait in pastel!  I did some in colored pencil back in the 80s but when I tried to do one in pastel, early in my time with the medium, it was a disaster.  So I decided it was time!

First I tried working from a photo that was taken over 12 years ago.  There was nothing particularly dynamic or interesting about it.  I got the measurements wrong in the face and it came out rather badly.  I plan to brush/wash it off–it’s on Wallis Belgian Mist.

Then last week I took some selfies and found one that I really liked with my head at an angle and my hair doing interesting things.  So I decided to give it a try.  I realized that I had 10 sheets of Pastel Premiere that I purchased to use in the Sally Strand workshop, which would have been this week!  It’s a perfect surface for a vignette portrait like this.  Very easy to work on and the color is lovely.

I spent all Saturday afternoon doing the drawing, first in graphite on drawing paper, then with charcoal on the pastel paper.  I immediately realized how much better charcoal is for doing the drawing for the painting. It’s so easy to change and work with.  I worked and worked and finally got my chin really straight and got the thinness of my face right. Then it started to look like me.

Then I was afraid to touch it!  I haven’t done drawings like this in a long time and realized how lovely it is to do this sort of drawing.  But I didn’t want to leave it at that!  So today I took the plunge and began adding color.  All of the colors in the face are Giraults–a mix of warmish pinks, oranges, browns, and a number of different warm greens.  The only soft pastel is in the hair.

When I did my original portrait, several weeks ago, I found that I had to keep reworking, brushing off, completely lost the drawing.  This time I was careful, knowing that the drawing was accurate. I wish I could be one of those brave portrait artists, like Christine Swann and Diane Rappisi, who Ive watched start out with a few charcoal lines and two values of color.  But, I’m NOT a portrait artist and I figure I can do this one the best way I can.  So I was happy not to lose the drawing.  And by using Giraults, I kept the pastel from getting cakey.

I wanted to keep the hair and clothing fairly loose and suggestive so didn’t labor over it too much.

I’m really happy with this attempt!  And yesterday I was able to set up a Youtube channel and put my first very crude video on it. It’s nothing I want to advertise a lot at this point, but I’m learning a lot!  This is a good time to be challenging ourselves in order to keep from worrying about other things.  I hope you are finding your own worthwhile challenges.

Spring in Washington Grove

Spring in Washington Grove, 16" x 20", UART 320

Spring in Washington Grove, 16″ x 20″, UART 320

Underpainting, stage 1

Underpainting, stage 1

Underpainting, stage 2

Underpainting, stage 2

Partial completion

Partial completion

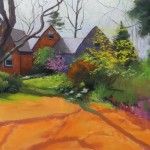
Hello Friends.  I’m continuing with all my routines, including painting.  This painting was primarily done last weekend but I knew there was something wrong with it.  I just fixed it!  Still not perfect but at least ready to send out.  This is a painting from the small, lovely community of Washington Grove, in Gaithersburg, MD.  It was formerly a Methodist summer colony with small houses with very pointed roofs. The houses are now occupied full time and many have been expanded. There are beautiful gardens, walking paths, and a feeling of great peace.  I need to go back soon!!!

What I liked about the photo for this painting was the strong diagonal of the tree shadow and the garden at right that lead the eye to the house, where a green tree and red bud are catching light.  (In the photo, the redbud is behind the tree and has no prominence. I fixed that!).  I also liked the way the orange sunlit bush at center right mimics the colors of the red brick house.  The house is of two colors, brick on the left and a grayed blue or violet on the right, which sets off the bush niclely.  This is a complicated picture, however, with many things overlapping others!

We were there on a day when it was sunny but clouding over fast. The lower part of the sky seemed a little darker and cooler than the top, which I think had more clouds in it.  I started with the sky and used several Ludwigs blue violets and turquoises, then did a little burnishing with a Girault.  I added the smaller  branches with several violet Giraults.

My main problem, which I fixed today, was the roofline.  If you look at the earlier versions of the painting, you’ll see that I didnt include the top of the roof extending to the left over the dormer.  When I saw this on closer examination of the photo, I knew immediately what was wrong!  Also, originally, I used only a light violet on the sunlit portions of the roof. Today, I added some yellow orange and yellow green to it and now it looks much more natural and fits into the overall landscape much better.

The most difficult part of me was the right side, with all of the various elements going on.  But getting the fence in really helped with the overall triangle-nature of this portion.  This painting is all about triangles!  There are many flowers and flowering bushes all competing with each other for the viewer’s attention.  The tree shadow was also a problem. Too straight!  I tried to break it up in places.  I also started the lawn with more yellow greens and my husband said it was too chartreuse!  So I cooled off the right side and bottom and left the warmest parts for the grasses leading into the center.  I love the way the land undulates!