Autumn in the Catoctins

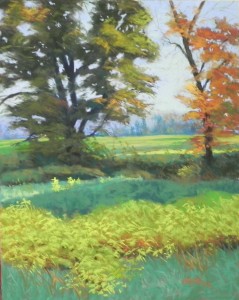
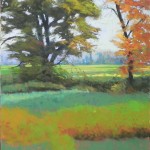
Autumn in the Catoctins, 20" x 16", UART 320

Autumn in the Catoctins, 20″ x 16″, UART 320

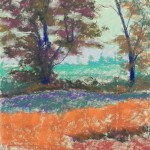
Underpainting, stage 1

Underpainting, stage 1

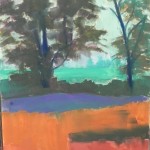
Underpainting, stage 2

Underpainting, stage 2

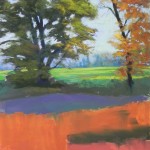
Top completed (almost)

Top completed (almost)

Initial rough in of color in the bottom

Initial rough in of color in the bottom

I’ve clearly been inspired to paint this week!  I just spent the day doing this painting from one of our first fall trips in mid Oct. to the Catoctin Mts. in Maryland.  There wasn’t a lot of foliage at the time, but we found a field with wonderful yellow green plants and light streaming through highlighting a few of them.  I’ve been wanting to do it for some weeks now.

I took a lot of pictures, both horizontal and vertical and settled on this one, as it emphasizes the large green tree, whose shape I really liked.   It also shows a lot of the background field and distant hills.

To begin with, I drew one line at the base of the trees, and then decided to start immediately with hard pastel.  I started with “bottle green” for the leaves of the green tree, then added red violet over it (whish just created mud with the alcohol!). It was kind of nice being able to skip the drawing stage and go right to the underpainting!  I used primarily cool under warm, etc. but not completely.  The cool violet really worked nicely in the shadowed greens. But I didn’t like the reddish color in the foreground and had to work to cover it all up. I saw a lot of orange under the yellow greens and that worked pretty well.

Colorwise, I was concerned that the less important tree on the right is the one with the fall colors.  But I think it’s the yellow greens that really dominate in the painting.  I brought some oranges into the base of them in the foreground and a few in the large green tree as well.

My first concern was to capture the shape of the branches in the green tree and its sky holes.  For the branches, I started with a dark blue, then a red violet then finally just went to dark brown.  It worked fine.  I used two blue violet Ludwigs in the sky initially, then lightly brushed aqua over the blue to warm it up in the center between the trees. I tried to keep the strokes loose in both trees.

The background hills and trees were kind of a challenge. I used a cool blue for the hills, with hints of very light orange in them and a variety of blues and browns to represent the trees.  For the field I began with a variety of greens and yellow greens, then put some pink over it to keep it form being too bright.

I used three values of blue green Giraults, along with a little piece of soft darker blue green in the grasses.  For the yellow green plants, I began with Girault and then Blue Earth.  I decided to bring the part in left front down close to the bottom as a compositional element to lead the eye into the picture.  I like the way the diagonal of light and shaded grasses leads the eye to the ravine and then to the distant field.

This was a pretty easy picture in that I really didn’t have to change anything much!  A pleasant change from the red leaves. I very much enjoyed spending the day reliving a pleasant memory and tried to pretend I was there painting it on site.  However, Rossini was playing on the opera and that gave me a little added energy!


Rock Creek Reds

Underpainting, stage 1

Underpainting, stage 1

Underpainting after alcohol

Underpainting after alcohol

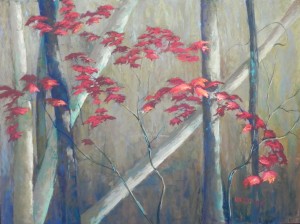
Rock Creek Reds, 18" x 24", UART 320

Rock Creek Reds, 18″ x 24″, UART 320

I’ve been working on my second tree painting since before Thanksgiving and this was was a lot more difficult than the one from Swain’s Lock.  There was no sky!  And there were lots of trees and limbs, all in very neutral colors.  But there was a lovely arc of red leaves that began in the upper left and stretched across and down to the lower right.  This really excited me and I knew I wanted to do something with it.  But what???

My first concern was the trees and the lack of sky.  In the photo, you can make out the creek at the bottom and lots of brush.  I thought perhaps to make it higher up where there could be some light coming through the trees.  The major thing was to figure out which trees to include and what values they would be.  I drew them in and settled on a group on the left, with two verticals on the right and a strong diagonal (in the photo).  Further along, I added several small twiggy bushes in the middle and on the right.  But I wanted to keep it fairly simple and more abstract. I wasn’t aiming for reality!

As you can see, the underpainting looks like something completely different!  I knew the leaves would be red, but that was about all!  And when I applied the alcohol it all got very dim and kind of Asian looking!

Colors were the next challenge. My initial thoughts were red, dark purples (in the trees) and neutrals.  But when I tried apply various violets to the background and trees, I found that the red in them was too close to the reds of the leaves and wouldn’t rovide adequate contrast.  So I decided on dark blues instead, then, somehow, found myself using some turquoises as well, which really exctied me!  Not them in the tree on left behind the dark blue tree.  So I used blues, turquoise, reds, and various browns and neutrals.

Then I tried to put in some blue to indicate sky holes, to open things up.  It was a blue violet and it just didn’t work at all.  So I brushed it off and decided to go with a very abstract background consisting of various browns, with some blues and aquas thrown in here and there.  One of the things I did to begin with was to use various soft pastels to apply color to the background, then took a really hard pieces of Caran d’ache brown and burnished it, so it would lay flat and go back. That worked pretty well.

I roughed in the leaves to begin with with a dark cool red Blue Earth pastel.  When I started painting them, I chose some purer reds and a few red oranges.  I worked on it through yesterday with those.  But I felt it was really missing something. So today I chose some lighter pinks and oranges and one really white-pink and this made a huge difference. Then I took a nice, rich red, and went over most of the dark leaves with that, giving most of them more chroma and interest.

I couldn’t resist using more turquoise and used small pieces of a pretty bright Ludwig in the tree trunks.

So I’ve signed it. But I’m not sure it’s completely done yet.  But it’s a lot closer t where I wanted it to be.  Any thoughts will be gratefully received!

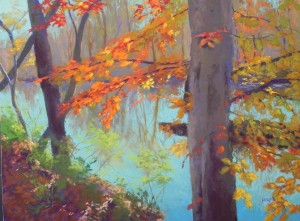
Autumn Oranges, Swain’s Lock

Autumn Oranges, Swain's Lock, 18" x 24", UART 320

Autumn Oranges, Swain’s Lock, 18″ x 24″, UART 320

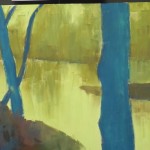
Underpainting

Underpainting

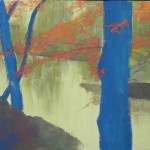
Orange branches lightly noted

Orange branches lightly noted

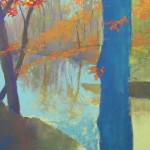
Background trees and water being added

Background trees and water being added

I’m on vacation!  I have a week off before my last week of zoom classes and I’m spending a good part of it painting. Most of what I’ve done this fall has been for the classes and now it’s time to paint for myself!  We’ve had a beautiful fall and I’ve had several lovely walks on the Canal and in Rock Creek Park.  I started taking horizontal pictures of varying colored leaves flowing across the picture and decided to try something different: horizontals.  So here is the first and maybe the best of the photos.  It’s from Swain’s Lock on the C&O Canal where the towpath opens up to views of the river and various small islands. It was a glorious walk!

But it was a difficult painting!  There are many layers and complexities but the two dominant beach trees, along with smaller twisting trees gave a basis to the composition.  I also liked the triangular shape of the water.  For the underpainting I used some of my favorite Caran d’ache hard pastel colors–a lovely blue and green in the trees and the olive browns in the backgroud, with yellow green in water and sky.  I loved this!  Then I decided to take one orange pastel and mark in the shapes of the branches.  I thought about stopping at this point!  But you know that’s not me!  It really reminded me of something one of the Canadian Group of Seven might have done.  Looking at this underpainting really inspires me to do more with these colors!

Anyway, I began with the background trees and water, using neutral and soft violet Giraults to provide a very light layer of color.  I used a Ludwig blue green for the water, with several darker ones around the tree on the right.  Then I hit the Blue Earth pastels.  The trees are a combination of violets and neutrals from the “Nearly Neutral” box.  But I did add some very dark Ludwig (maybe it’s Eggplant) into the trunks to give them more weight.  I used my boxes of orange, violet, and earth green Blue Earths, along with various other soft pastels to creat the leaves and greenery.

I had to add more to the orange branches to make the stand out from the business on the right.  There was a line of bright yellow leaves on the right which I put in at first and then toned down, deciding that it detracted from the oranges.  For the leaves at right, I used a combination of orangey browns with a warm green and grayed yellow green on top.  There is also a dark red in some places.

I worked from my IPAD mounted on a tripod that I got for teaching. It works really nicely and keeps me from print the color image–which would be flatter.  I do print the black and white to aid in the initial drawing, however.

Not sure what I’ll tackle next but if I’ll wish you all a happy AND SAFE Thanksgiving this year.  Not the time for family gatherings, sadly.  But we still have much to be thankful for.  I’m particularly thankful for the 21 wonderful students who took my classes this fall and went through all the technological challenges with me so good naturedly! We had a wonderful time together.   I’ll be teaching again in the winter and welcome people from anywhere!  I currently have a friend from Massachusetts in my classes.  As long as you can deal with the time zone, you are welcome!  If you are interested, write to me at; jeanhirons48@gmail.com.

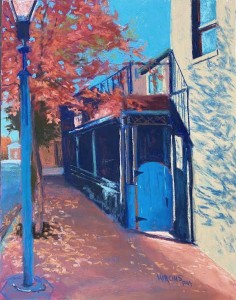
Autumn Complements, Frederick

Autumn Complements, 14" x 11", UART 320

Autumn Complements, 14″ x 11″, UART 320

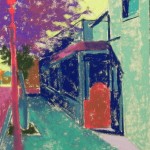
Underpainting, stage 1

Underpainting, stage 1

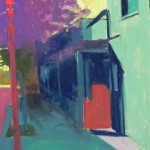
Underpainting, stage 2

Underpainting, stage 2

I actually had time to do a painting today that was not for my class!  I’ve been really busy doing demos and filming them, as well as paint alongs of still life.  Haven’t had any time to just paint what I want to paint!  But that is changing.

Several weeks ago we took a ride into the country and then to Frederick, MD, where I’m in the District Arts Gallery.  It was a beautiful day and I took a number of pictures.  This one caught my eye because of the blue green door and the red orange tree: complements!

So to begin with, i have to tell you that the color in the photo just isn’t right.  I’ve tried both camera and cell phone but can’t get the right color of the door and post.  It’s more of a peacock blue green, whereas the picture makes it look straight blue.  I thought the color of the door was really great, along with the red oranges of the tree, and the light hitting the front of a restaurant.  Then there is the shadow of the tree being cast on the wall at right.  It’s quite a complex but intriguing picture.

I used a dark turquoise for the sky–it was the only thing bright enough.  I used dark blues primarily for the porch of the restaurant, then added turquoise light onto it.  I always like this part!

The green underpainting for the right wall worked really nicely.  I used a dull grayed yellow on tip and let some of it show through.  I then added the shadow on top.  It was fine.

For the side walk I used a combination of cool and warm reds with some blues and blue greens mixed into it to vary the value and temperature.  The last thing was to add the fallen leaves and that was easy too.  I’m disappointed that I can’t seem to capture the exact color of the door but I”m happy that I’ve finally done this painting that I’ve been thinking about.

I’m now waiting for some UART boards from Dakota and plan to do a series of horizontal trees with leaf patterns.  Excited about those!


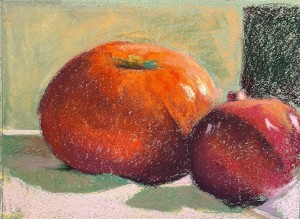
Surface DOES Matter!

Autumn Still life 9 x 12, Canson Mi Teinte

Autumn Still life 9 x 12, Canson Mi Teinte

Autumn Still Life, Pastel Premiere Italian Clay

Autumn Still Life, Pastel Premiere Italian Clay

Hello Friends

I haven’t been able to post lately.  It’s not that I haven’t been painting!  I’ve been doing demos–seven of them!–for my fall zoom classes. I have three sessions with 21 people and I;m using the same demo for each, in addition to powerpoint lectures.  It’s been really fun.  We are in the second week now.  I have a friend from Massachusetts in the class, as well as painter from Annapolis. One of the benefits of online training.

The classes run three hours and my prepared materials run about two.  I asked them what they’d like to do for the third hour and they decided on a paint-along.  This seemed like a good idea so I got a still life filmed and sent it to them all.  With three classes, I knew I was going to be doing the same still life or other subject three times each week!  So I thought maybe I should save my valuable paper and use Canson Mi Teintes.  I had bought some for exercises and color studies but got some more in a nice medium brown shade.

On Wednesday we did the first of the paint-alongs.  Right from the beginning I was frustrated as hell!  And I could hear other people griping about their paper as well! I couldn’t get a good dark. I couldn’t cover up the paper–and I was using the smooth side.  The colors just didn’t sing at all.   So I decided that was the end of the Canson.

Today I used a smaller sheet of Pastel Premiere Italian clay, about the same color as the Canson and what a different experience–like night and day!  I used Giraults and Ludwigs and they went on beautifully.  I was able to layer more successfully and really achieve the sheen of the vegetables.

In my classes, I’ve always taught that the surface is the most important thing.  I basically don’t let people use Canson or Strathmore paper in my classes.  For beginners, it’s UART and the PP Italian clay.  More experienced people work on pastelmat, black UART, and a variety of other surfaces. When I teach people in my studio, I have a variety of surfaces that they can purchase from me to try out.  Can’t do that now, unfortunately.

This experience of online teaching has been frustrating, scary and really fun!  I’ve been very fortunate to have a good friend as one of the students who is great with technology. She’s helped me at every stage and has been editing my videos for me.  I’m very fortunate.  I purchased an all-in-one computer for my home studio and run the zoom classes on it.  It feels good to be using my beautiful home studo again.  And–fortunately–I still have my public studio where I teach one-0n-one once a week.  My student is, in effect, paying for the studio!

Looks like we’ll be doing this again in the winter.  I actually hope so. Having put so much effort into it, I want to do more teaching this way.  The videos are great. The downside is using the IPAD for live demonstration.  The colors and lighting are really off.   It has to be positioned just so and something I can’t get to the painting surface!  If anyone knows more about this and can share advice, I’d appreciate it.

Anyway, I’m having a good time with this and am hoping you are finding ways to keep busy creatively as well.

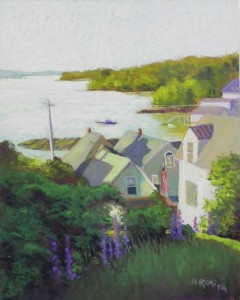
Rooftops and Lupines, Stonington, ME

Rooftops and Lupines (Stonington, ME), 20" x 16", UART 320

Rooftops and Lupines (Stonington, ME), 20″ x 16″, UART 320

Underpainting, stage 1

Underpainting, stage 1

Underpainting, stage 2

Underpainting, stage 2

Partially completed

Partially completed

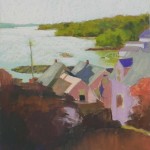
It’s been over a month since I last posted on this blog!  It’s been a really busy time.  I gave the Cloud Workshop in August at the same time as dealing with a family issue that will continue for some time (not my immediately family, fortunately).  After the workshop, I began working on my fall classes. I now have 7 Powerpoint presentations done and 2 of the 7 demos I’ll be doing!  This will all be done on Zoom.  SO–anyone in my time zone can take it!  I’m teaching 3 days a week–Wed., Fri. and Sat. 10-1.  The zoom sessions will last 2 hours with critiques, powerpoint lectures, live exercises, pre-recorded demos and discussion. The last hour will be for one-on-one assistance.  I’m limiting classes to 10 people but still have room in all of them. The classes will consist of 7 color projects dealing with theory and relationships and should be fun.  $275 for the 8 week session beginning the week of Oct. 5th.  If interested, let me know!

Now–for a real painting!  I started this painting last Monday as a demo for a private student and finished it today.  It’s early morning in Stonington, ME on a visit in June 2017. There were no lupines in the photo, but they were blooming everywhere else.

I love the composition–the large shape that reaches up on the right and way back into the distance.  That was what drew me to it.  I also liked the shapes of the roofs and the shadows on them.  My initial thought was to do a green and orange color scheme, as I saw a lot of oranges in the photo.  But then I thought about including lupines and realized that adding violets would give me a triad that would be more balanced and I’m very glad I did it!  The violets made all the difference in this picture.

I decided to start out the underpainting with a lot of warm colors–my typical yellow green in the sky and water, pinks for the roofs, and orange-browns under the foliage. I mixed some dark green in with it and it gave me a lovely deep, warm background for the greens.

For the sky and water, I started with a light blue green, then brushed a very white orange over both.  I added a light violet to the right side of the sky and some to the water as well.  The one challenge I had was the roof colors.  As you can see in the partically completed painting, I started with the idea of an orange roof on the house in the foreground.  It had a light green roof in the photo.  I ended up using a peach and I knew that it wasn’t right.  It just didn’t look like any roof you’d see in Maine!  So the first thing I did today was to brush it off and go with lighter greens, ending with a light yellow green Schmincke that made it really stand out.  For the large roof on the left, I put green on it initially.  Today, I brushed a yellow orange lightly over it and it worked really nicely!  It’s got the same quality of color as the other roofs but more light and orange in it.

The foreground greenery was started with some Ludwig “eggplant”, then some dark greens and a couple values of warm green.  I left out a staircase on the far right that was blocking the sunlit grass and was glad I took it out as it would have added nothing.  I used the light yellow green on the right, then added smaller pieces in front of the house behind the greenery .

For the windows I used combinations of light violets, orange, and greens and loved the combinations they made.

I’m happy with this picture. It speaks to a happy trip that my friend Sarah Miquelle and I took to deliver paintings to a gallery in Blue Hill. I love Maine and miss being able to get to New England.  Hopefully next year.

Day Break, New Mark

Day Break New Mark, 14" x 11", UART 320

Day Break New Mark, 14″ x 11″, UART 320

Underpainting stage 1

Underpainting stage 1

Underpainting, stage 2

Underpainting, stage 2

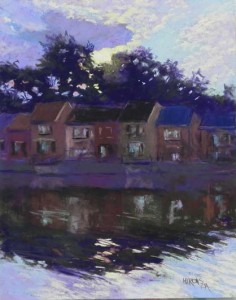
In anticipation of tomorrow’s “Cloud Workshop”, I spent several lovely hours in my public studio painting an early morning picture from the neighborhood (New Mark Commons development in Rockville, MD).  Once July arrived, I started taking early morning walks and have seen amazing skies filled with altocumulous clouds.  In this picture, the sun was breaking out behind the townhouses on the lake and it was quite dramatic.  In this “summer of going nowhere” one has to take what one gets!

I did a very rough drawing of just the top and bottom of the dark areas.  I saw it as one big shape of dark with sky holes and light subtle indications of windows and roofs, etc.  For the underpainting I chose a green for the sky areas and then a violet and orange for under the clouds.  I’m really NOT sure why!  I don’t particularly recommend the orange as I had to work hard to cover it all up.  But, at least wasn’t hard to do. For the dark mass in the middle, I used a combination of bottle green, dark blue, red and brown.  Made a lovely black!  So the underpainting took very little time.  It’s not the loveliest I’ve ever done, but it worked–quickly establishing shapes and giving me something to work over.

For the clouds, I first started with blues, but then realized I needed to have violet to set of the yellows of the sun.  So they are various shades of violets, mainly Great Americans, I think.  The sky is a combination of blue and green.  For the clouds on the right, I put in a lighter violet then yellow on top, to show light and shadow.

The major problem with this painting was not having enough room!  Once I started drawing in the roofs and houses and reflections I was afraid I wouldn’t have a bottom!  So I tried to make the houses smaller and ended up with enough of the sky reflection in the water.

For the trees, I started with a Ludwig “eggplant” and used some dark warm green over. In the area where the sun is shining over the tree, I began with some warm oranges, then a yellow green very lightly applied.  I added various yellows and oranges and blues in the sky holes.

For the houses, I really wanted to keep them very loose.  I paid attention to the angle of the roofs and having a lighter color house with a darker roof, etc. but for for the windows, they are just pieces of lighter browns and blues that I then added to the reflections in the water.  I’m pretty happy with the effect.  I want it to be clear that these are townhouses on a lake but I didn’t care about all the details.  (I joked to my friend who I was painting with that I was tempted to paint one of the roofs pink.  My husband is in charge of the architectural review committee in our community, which is on the National Register, and certainly NO pink roofs would be allowable!)

There is a pump in the lake which causes the ripples in the water.  This was one of the more challenging things –I thought–about the picture.  However, I found that using diagonal strokes of the dark violet, blue sky, and yellow clouds worked fine and gave the effect of moving water.

This was a very quick painting but a fun one to do.  Now, I’m totally out of inspiration.  It’s muggy, horrible, mid summer weather.  I hope many of my readers are in nicer climates or  have been able to get away to some type of vacation destination–although I realize it’s doubtful!  Perhaps it’s time for still life!


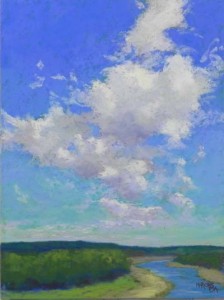
Clouds Over the Iowa River

Clouds Over the Iowa River, 16" x 12", UART 320

Clouds Over the Iowa River,
16″ x 12″, UART 320

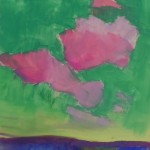
Underpainting

Underpainting

Here is one more painting–done this weekend in anticipation of my Cloud Workshop.  I decided I really needed to get some more practice and this picture just jumped out at me to be painted!  I spent a lovely time on Saturday afternoon with this, ignoring all of the technical details I have to worry about to do a virtual workshop!

I did a very simple underpainting after roughly drawing in cloud shapes.  I used three shades of pinks.  Used three greens for the sky with a yellow green at the bottom.  I’m finding the greens work so beautifully.

For a painting like this the first challenge is the sky itself.  I used Ludwig blues and blue greens.  Then added more light blue over the blue greens.  I’m finding it impossible to find the right blue!  The Ludwigs are all either really cool or violet or really warm green blues. Great American “beacon” used to be just the right color but it got changed. However, in hopes that they might have been changed back, I ordered some from Rochester Fine Art.  We’ll see!

For the clouds, I used a mix of grayed violets, blues and blue greens all in very soft varieties, such as Great American.  This painting was done at home. My Blue Earths have resided in my other studio but today I brought them home too!  For clouds, the softer the better.  It’s probably why I like painting them!

For the light areas, I used a Ludwig pink with a soft yellow in the brightest part.  The light pinks work really nicely and allow more room for sunlight to be added.

I kept the land very simple. There was a bridge going over the river that I got rid of.  I took this picture on a walk on the “high line” north of Des Moines last September.  It afforded beautiful views of the sky.  Iowa has GREAT clouds!!!  (In case you are wondering, my husband’s daughter lives in Des Moines).


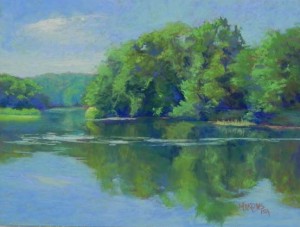
The Potomac River at Nolands Ferry

The Potomac at Nolands Ferry, 12" x 16", UART 320

The Potomac at Nolands Ferry, 12″ x 16″, UART 320

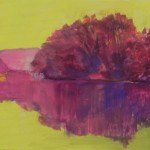
Underpainting using yellow and a variety of reds

Underpainting using yellow and a variety of reds

Here is the second painting completed today, this one done on my own.  It’s a very peaceful painting of the Potomac from a spot we explored for the first time last weekend.  Noland’s Ferry is on the C&O Canal near Point of Rocks in Tuscarora, Frederick County, MD.  The river is wide and peaceful, making it  a perfect spot for boating.  I took this shot from the landing to get a clear view of the river without bushes and trees obscuring it.

I knew this was going to be a blue/green painting–hard to escape it!  So I started with lots of reds and pinks and with yellow green in the sky and water.  You really don’t see any of that in the finished painting, but I find it so much easier to paint over colors like this.  Underpaintings are really for me, I’ve decided!

I began the painting last week and was afraid that I was getting too fussy with it.  I did the sky and left side of the painting.  The sky was a clear blue.  I used a very light yellow Schmincke and layed some of it at the base of the sky then decided to add a cloud shape and was really happy I did.  It gives the painting a lot more interest, I think.

Today I was at the studio without my glasses!  So I couldn’t be quite as fussy.  For the trees and reflections, its all greens, dark blues and a few violets. I was able to insert small pieces of “orange” for the bank, which are a welcome change.  I thought about trying to add some oranges or pinks but decided not to fool with it.  What I really enjoyed was “sculpting” the trees with dark against light.

One of the reasons for the photo and painting is the ripples of light crossing the still water.  I thought this really made the composition.  In the photo, the sky and water are “white” even though it was a deep blue sky day. So I had to wing it.

It was nice to paint this very calm and cool painting on a very hot day during turbulent times.


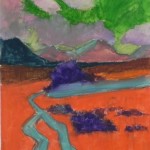
Rocky Mountain Path

Rocky Mountain Path under

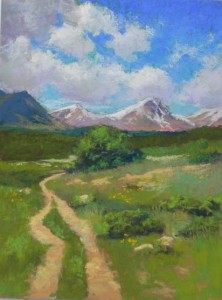
Rocky Mountain Path, 16" x 12", UART 320

Rocky Mountain Path, 16″ x 12″, UART 320

I’ve been painting 12 x 16 size paintings in the last few weeks and find it’s a nice size for doing some cloud and water work.  This painting was done as a “paint along” for a student who I work with in my studio.  The photo is from our June 2019 trip to Estes Park for the wedding of my nephew.  Seems like a loooong time ago!

In the photo the central tree is much larger and obscures some of the mountains. I decided I wanted  them to be more prominent so I lowered the tree into a bush and made a little more of the path, leading it around behind the bush.  You can see from the underpainting that I used some pretty bright colors.  I’ve been favoring green under blue in my skies lately and it worked nicely.  The red under the green also worked well.  I made a number of changes to the composition after the underpainting. But that is the nature of a painting like this and it makes them fun to do.  You can add various colors and shapes or change what’s there.

The sky was the first challenge with bright blues and lots of puffy clouds.  In the photo the mountains are surrounded by clouds, but I wanted to have blue sky to set off the snow ridges.  I used my Blue Earth blue and cerulean sets for the clouds, using a number of their grayed colors.  Having been focused on clouds lately, I realize how important it is to have SOFT pastels to do them.  Blue Earth, Great American, Schmincke are all really great for these.  They go on like butter and make it SO much fun to do. Just remember to use a light touch!

Having done this painting in stages, while my student worked on his, I was rather anxious today to get it done.  I really enjoyed putting in the path and the various rocks, bushes and colors of greens in the landscape.  I particularly liked a light grayed green that I stuck behind the bush.  I thought it might look like a band of flowers.  I did add some small pieces of orange to denote flowers in the foreground but they aren’t really obvious.

This painting was fun to do and having a path like this with a beautiful backdrop made it all the easier.