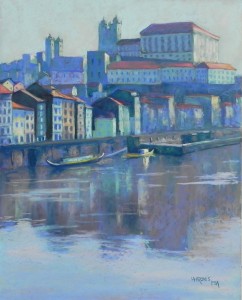
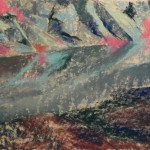
Morning Light, Porto

Morning Light, Porto, 20" x 16", UART 400

Morning Light, Porto, 20″ x 16″, UART 400

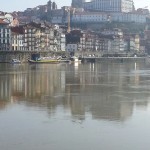
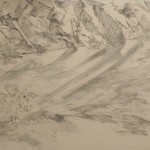
Reference photo

Reference photo

I began this painting a couple weeks ago and just finished it today. I kept seeing more things I wanted to change!  Now, I’m finally happy with it.  I don’t seem to have a picture of the underpainting, so I’ll include the reference photo and final painting.  I made two significant changes to the original photo.  First, compositionally, I gave the shoreline more of an angle. I wanted to play on the triangles of buildings and reflections.  I also left out a small boat on the left that I didn’t like and did a lot of simplification, particularly in the skyline. I deleted a lot of things at the top of the picture so as to have a clean line of buildings against sky.

The second change, as you can see, is in the color. The photo is gray and brown!  My two least favorite colors.  I decided to work with a split complement of blue greens, blue violets, and warm red oranges in the roofs.  All of it had to be toned down and grayed over, particularly the building at the top.  But I really liked the color combination.  I began the sky with Giraults but when I came in on the second day, I realized that it was too blue violet and dark. So I used one Ludwig aqua and went over the sky, leaving small pieces of warm orangey underpainting showing through.  It felt like the light came on!  I liked the simplicity of it.

The buildings at lower left were a challenge because they were the closest and required some details of windows.  The photo was very complicated, but I tried to indicate windows without too much detail. The buildings past that were a lot easier!  I just used shapes of warm and cool colors to indicate light and shadow.

The water and reflections took some work and I went over it many times.  I really liked the small boat with the light hitting it and decided that that would be the center of interest.  I omitted other small lights to the right of it that would have been a distraction.

Really happy with the way this one came out.

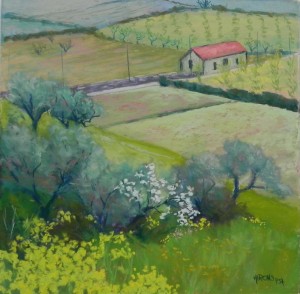
Spring Fields, Douro

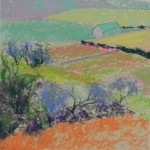
Spring Fields, Douro, 16 x 16,  UART 400

Spring Fields, Douro, 16 x 16, UART 400

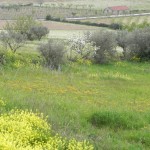
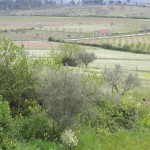
Reference photo 1

Reference photo 1

Reference photo 2

Reference photo 2

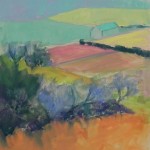
Underpainting, stage 1

Underpainting, stage 1

Underpainting, stage 2

Underpainting, stage 2

I’ve just completed a painting from Portugal on yet another cold, rainy day. For this painting, I decided to use one of my new 16″ x 16″ True Grit pastel panels (all UART 400) that I purchased from French Canvas.  I like these mounted surfaces very much. No buckling!  And interesting sizes as well.  Anyway, I decided to paint a scene of a small red roofed farm building that I filmed from many different angles. I printed four different images and played with them. Decided on two and taped them next to my board.

To begin with, I really wasn’t sure what I was going to do with the background (top) or the foreground trees/bushes.  After one sketch, I decided to jump in and see what would develop.  I began the underpainting with color shapes, using a lot of “pastel” colors.  Because these were light, there was a lot of white in them and the resulting underpainting looks rather chalky.  But it was OK for my purposes.

The top of the painting went through several stages. I started it out with blues, thinking of making it into trees, as in photo 2.  But I didn’t like it. I finally decided to enlarge the building to bring it closer and just have more fields in the distance. However, the blue undertones helped it recede.  For the fields, I played with various colors, using pale greens over pink undercolor, and orange over the greens in the upper left field.  I added small trees and gave some patterning to them to make them as interesting as possible, while not too prominent.

The building was a challenge.  The roof was too red. I went back and forth between pink and orange to tone it down. I added lighter, more grayed reds and finally a little light green to gray it a bit. I enlarged it from the original drawing, as you’ll see from the underpainting.  I like the size of it now and its position.

For the foreground, I decided to use olive trees, the white flowering bush in photo 1, and some of the yellow flowers that were spectacularly blooming everywhere. I decided that I really liked using the cool blue greens for the olives, as they complemented the cool red of the roof.  I added some browns to them and finally a few touches of light grayed red.  At the very end, I added a few pink flowers near the white bush to further bring the red forward.

I really enjoyed doing this picture. It reminds me of the Impressionists, of course.  We just don’t see small varied fields like these in the US.  I also really enjoyed using the square format and liked the 16 x 16, not as small as the 12 x 12, but easier than the 20 x 20’s I’ve done in the past.


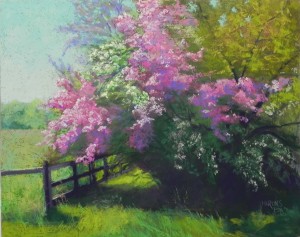
Magnolia, Kenwood

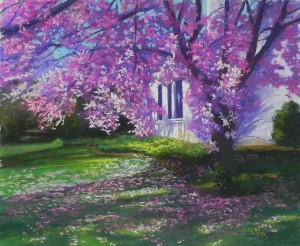
Magnolia, Kenwood, 20 x 24, pastel premiere white

Magnolia, Kenwood, 20 x 24, pastel premiere white

Hello friends. It’s been awhile since I’ve posted as I was away most of April.  We spent two weeks in Portugal, which was quite lovely and a whole lot drier and sunnier than it is here. We are having an unprecedented period of rain and showers and I pray that it won’t last too much longer!  It’s really affecting my spirits.

Anyway, this picture is in the category of “what was I thinking?”!!!  I took the picture last year in a lovely neighborhood of Bethesda, Kenwood, which is noted for its cherry trees. I liked the idea of painting this magnolia–not a cherry.  I took the picture because I really liked the light hitting the white house in the gap in the tree.  I liked the picture but had decided it would be pretty labor-intensive to do (that was last year!).  This year, I decided to give it a try.

For the underpainting, I used blues in four different values to lay in the tree trunk, house and shape of the blossoms. I wanted to begin fairly cool, to help indicate a sense of shadow.  I began the blossoms with a dark magenta, laying in a general area of them, then added progressively lighter pinks and finally a pinkish white. In the shadowed areas, I added violets to the magentas. I used my lemon yellow AS extra soft tinted white for the house and some of the white blossoms and like the contrast with the cooler pinks.

I made one small change in the composition. In the back left, there was a fence, which I changed into several steps. I thought that would leave the imagination open to wandering beyond, rather than shutting it off with the fence. It’s a small detail, barely seen, but I liked the effect.

Don’t know what I’ll be up to next. Was hoping to get outside but no chance of that just yet.  I hope it’s sunnier where a lot of you are!

Cherry Arbor, Cleveland Park

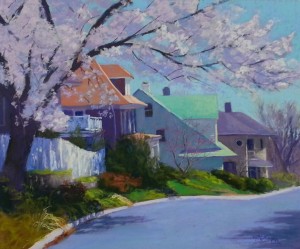
Cherry Arbor, Cleveland Park, 20 x 24, UART 400

Cherry Arbor, Cleveland Park, 20 x 24, UART 400

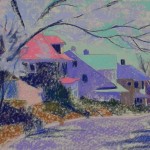
Underpainting, first stage

Underpainting, first stage

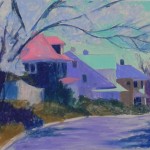
Underpainting, stage 2

Underpainting, stage 2

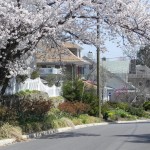
Source photo

Source photo

I spent today in the studio doing the painting I had originally planned to do during the Open Studios weekend. It’s the beginning of a new series of paintings on Spring in Washington. I have no idea what else I’ll do, but I think it’s a good topic. However, those who know me know that spring is NOT my favorite time to paint.  Too much pink and yellow! And everything is rather sweet-looking!  I much prefer autumn and winter, thank you!  BUT–spring is our premiere season here and I can well understand why people like it.  My thinking is to feature the different flowering trees in different paintings–cherries, magnolia, redbud, dogwood, etc. By combining with houses or other buildings, perhaps it won’t get too gooey?  (Might take several years to complete, however!)

Anyway, the painting I did today is from a walk in the neighborhood of Cleveland Park in NW DC.  John and I spent several lovely hours walking around looking for alleys. And we found them. However, this is a street scene rather featuring the wonderful architecture. I loved the shapes and colors of the houses and their roofs, the light hitting from the right, and the arbor of cherry blossoms at the top. But I wasn’t sure about the fence and deck on the left. And the house with orange roof had three separate porch roofs! (See source photo) So I knew that I had to do some simplifying. I particularly wanted to simplify the white fence, which had too many dips and fancy lintels on the posts.  My initial thought was that the painting would be about the house with the green roof and the light and shadow hitting it (and that great round window to the right!).  What I like about the white fence is that it leads the eye into the rest of the picture and hopefully the pieces of light hitting the building help carry it through.

I began the underpainting a week ago and started by laying in the darks with a very dark blue.   I used some varying colors and some that are quite close to the final color (see the green roof!).  I put hot pink under the orange roof and rather liked it.  For the cherry blossoms, I used a combination of blue and pink hard pastels to roughly lay in the blossoms and a green for the sky.  When I began painting the cherry blossoms today, I began with a red violet, and then added some blue violet over it in the shadowed areas. I used a cool pink and a very light pinkish white for the areas where the light was hitting.

The road was a challenge. I gave it a twist on the right to try to make it more interesting, but there is too much of it, I think.  I left out the telephone pole that was going right up the middle of the picture, so I couldn’t add the shadow of it or it’s wires.  So I tried to do by layering a number of colors: red violet, blue violet, and then a cool green.  The green really did it, I think and helped tied the color of the road to the rest of the painting (I hope).

This is a fairly well-known street due to the architecture of the houses. I just stumbled upon it and was happy to find such interesting subject matter!

I will be away for the rest of the month–visiting my mother this week in Mass.  Then going to Portugal and a Viking river cruise of the Douro river.  Have never been there and look forward to seeing Lisbon and the countryside.  Hopefully in May it will warm up enough for some plein air painting at last!


Spring Apples No. 2

Spring Apples, No. 2, 16 x 20, pastelbord with AS liquid primer

Spring Apples, No. 2, 16 x 20, pastelbord with AS liquid primer

Stage 1. picture as completed at demo

Stage 1. picture as completed at demo

Background completed

Background completed

Yesterday I spent several very happy hours in my home studio finishing off a demo that I began for the Olney Art League last May!  The board (a resurfaced pastelbord) had been sitting in my studio all that time and I had decided to chuck it. It was next to the trash can!!!  But then I received an inquiry from a friend in the library community about my painting Spring Apples from my newsletter.  When I told her the price, it was too much. But then I remembered the one I was about to toss.  So I offered to try finishing it off for her.  She loves it and I’ll be bringing it to my framers today.

When I began this for Olney, I used a brown-toned Art Spectrum liquid primer to cover a pre-used pastebord.  I talked about the need for texture in this type of subject matter. My previous painting had been done on Rives with the primer.  The brush strokes in this one are much more obvious in this one, the substrate being harder.  At the demo, I did an underpainting, then began broadly laying in the areas of color–sky, field, green and pink trees.  I’m showing you the painting as it was completed in the demo (stage 1) and the painting after I’d completed the background (stage 2).  I used a warm blue green and a light yellow green for the sky and once it was complete, I fell in love with the painting and knew I could do a good job with it!

I used nothing but soft pastels for this. Because the surface is so hard, the soft ones are needed. I found a wonderful array of Great American “majenta” pastels in my storage boxes and used them for the pinks. I used very light greens for the white apple blossoms, and added yellow on the ones facing the sun. I used a mix of very warm brownish greens for the tree in upper right corner.  Very dark green and Ludwig “eggplant” for the dark area under the trees.  There are some small pieces of light grasses that I added into the dark that may be seen if you look at the picture in an enlarged format.

I’m so happy that I rescued this painting and completed it. Now that it’s spring again, I could finally get into the mood to complete it and having a buyer never hurts!!!

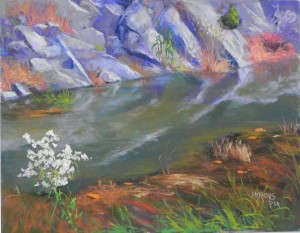
Autumn White (Demo)

Autumn White, 14" x 18", UART 400

Autumn White, 14″ x 18″, UART 400

Stage 1. Graphite lay-in

Stage 1. Graphite lay-in

Stage 2. Hard pastel underpainting

Stage 2. Hard pastel underpainting

Stage 3. Underpainting with alcohol

Stage 3. Underpainting with alcohol

Stage 4. First pastel on rocks

Stage 4. First pastel on rocks

Stage 5. Water and reflections

Stage 5. Water and reflections

Stage 6. White flowering shrub added

Stage 6. White flowering shrub added

Stage 7. Bottom grasses added; demo ended

Stage 7. Bottom grasses added; demo ended

Today I did a demonstration for my Monday class. I then worked on the painting in my studio and finished it. Two of my new students weren’t there, so I decided to take a lot of pictures at

Stage 8. Rocks completed, more in water

Stage 8. Rocks completed, more in water

Stage 9

Stage 9

various stages, which I will put in this blog and discuss what was happening at each stage.

Stage 1–the lay-in was done yesterday using an HB pencil, then going over it with a brush and water.

Stage 2. I began the underpainting using various greens and grays, and a very dark green at the bottom with a little warm color added in. I told the class not to get too worried about the colors one chooses for the underpainting. What’s really important are the value shapes.  I went with various greens because I had the right range of values and I figured I’d end up with violet!  I chose one reddish color to work in the colored grasses at the top, using red as a cool color over which orange would later be added.

Stage 3. I quickly applied the alcohol. What was pleasing was that I could still see where the reflections of the rocks were and the diagonal leading back to the flowering bush.

Stage 4.  I did the rocks pretty fast for me!  I used various blue violets and neutrals and tried to maintain the diagonals. I worked quite freely and abstractly, using more colors than I really wanted in the finished painting.

Stage 5. I next worked on the water and reflections, I decided that I had to lay it in behind the bush before I could add it. So I used Giraults and Ludwigs to get the part of the water behind the bush complete enough to add it in (they all wanted to see that in the demo, of course!)

Stage 6.  I next added the bush using very light violet, green and cream Schminckes and a lemon yellow tinted white.  The bush started out too small, but I just worked on over it. Brushing it out would not have been a good idea!  The really soft pastels are needed at this point in order to be able to get a clean stroke on top of the layered greens of the water. I used a pretty firm push to add the color.

Stage 7. At this point, I added in the warm colors of the grasses at the bottom, working from dark to light.  I stopped the demo at this point–1.5 hours total!

Stage 8. In my studio, Took a new look at it and decided the rocks were too dark. So I used various Giraults and soft Schminckes to lay in more neutral colors, lights and a more constant shade of violet.  I also began adding more colors to the grasses in the rocks to make them less red.

Stage 9. I added the small plants, grasses, etc. to the rocks, and did more with the water and reflections.

Final: I added the green grasses at bottom.  This is an unusual painting as it isn’t really a landscape, more of a still life in a way. There is no real distance in it!

This is the last painting from the fall set of photos. Hoping to get to the canal this week when the temp. goes into the 70’s.  I thought I’d also mention that my mounted UART is from French Canvas, which creates True Grit Pastel Panels. There are a number of different sizes, such as this 14 x 18.  I also got 16 x 16!  They are quite nice, come individually wrapped and don’t seem to warp (yet!)

Rock Pines

Rock Pines, 16 x 20, Pastel Premiere

Rock Pines, 16 x 20, Pastel Premiere

Underpainting before alcohol

Underpainting before alcohol

Underpainting with alcohol

Underpainting with alcohol

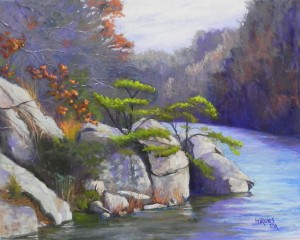
Here’s another painting from my October series. I needed something to do this week!  I have one more, which will be a demo for my Monday class. This one was different from the others I’ve done as it includes more trees, skies, and distant water. Not such a “portrait” of the rocks as the others. I began with a vague idea of where I’d go with the color. Used blue greens in the underpainting. I started with the sky and put a light cool blue in with clouds. Instinctively, I picked up grayed red violets and warm neutrals and it was all over!  I had originally thought I might simplify the trees on right into a single mass of value, (note the underpainting) but once the underpainting was complete, I realized it was much too big. So instead, I worked with values and temperature to make it recede and create more interest.  I started the large mass behind the left side with grayed red violet, then added subtly darker and lighter strokes to indicate branches. In the photo there is a large evergreen behind the smaller pines (?) which I left out. But I decided to add some green into the background to suggest a distant pine and connect the greens to the orange leaves. One of the last things I did in the water was to add aqua just to the right of the furthest rock and this really made it!  I particularly like the dark green bush at left. I found several greens that were just a little lighter than the dark and I liked the subtle effect of it.  This is far from being my favorite from this series, but I enjoyed doing it.
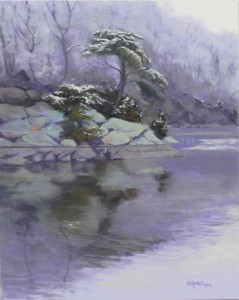
a Touch of White

A Touch of White, 20" x 16" Pastelbord

A Touch of White, 20″ x 16″ Pastelbord

A Touch of White--Study, 16" x 12" , pastelbord

A Touch of White–Study, 16″ x 12″ , pastelbord

Watercolor and gouache underpainting

Watercolor and gouache underpainting

Last week I gave a demonstration for a local art league, the Montgomery Art Association.  Two weeks ago we had a lovely,  small snow fall that left an inch or two on trees but nothing on the roads. I knew it wouldn’t last long, so I left the house at 8:30 AM and headed for Wide Water. I walked with frozen fingers taking pictures, all of them pretty gray!  I thought I’d have a lot of material to work with, but in the end, I decided that this one scene was the best and probably the only one worth doing.  What was really lovely was the snow on the trees and the yellow sky that was beginning to lighten but wasn’t blue.  There was only snow on the tops of the trees, none on the rocks, as I’d hoped there might be (I guess they retained too much warmth from the sun). But the white on the dark pines against the slightly darker background was quite beautiful. I knew that I had my demo subject.

I made some compositional changes by removing other trees behind the main tall tree. I wanted that to stand alone against the background trees. I loved the fact that the background trees, though snow-covered, formed as shape that was darker than the sky but lighter than the tree.  I spent some time doing small color studies on LaCarte, just playing with the color of the rocks, which were their actual green color in this unsunlit photo!  (The green is lichen that covers them.) The color studies were fun, but I felt I needed to have a better sense of where I would be starting.  Since this was pastelbord I’d be working on, and because I wanted the picture to have a lightness to it, I decided on a watercolor underpainting.  AND–I decided to do the whole thing first in a smaller size!  So I used a 12 x 16 board and did the entire painting. This was useful, because I knew I couldn’t finish the painting during the demo but I could show them the finished 12 x 16 at the end. There is one major difference in the two paintings. In the smaller one, I followed the photo and divided up the rocks on the right side. In the demo, I followed the suggestions (pleading?) of some of my students in attendance, and left them larger.  I do like it better.

The colors in this picture are all grayed red violet and subtle greens. There is a little warmth in the orange grasses that grow among the rocks but that’s it!  The coolness and simplicity of color and shapes, gives this picture a more poetic feel, I think.  The small portion of sky was done with two layers: a very light red violet Unison and lemon yellow Art Spectrum tinted white (a very useful pastel!).  I added just a little of the yellow at the bottom but wanted the water to read darker.

The background trees were really easy. Having done both color studies and an initial painting, I had chosen a light violet that would be used to indicate the snow covered limbs. I used Girault grays to indicate the darker under areas, and the ridge on the far right.  For the rocks, I wanted the area on the right to have the most warmth, so I started out the others with grayed violets and cooler greens.  There is a subtle difference that I think works. For the light area of the water at bottom, I used a light violet and an interesting Ludwig pastel that looks cool but goes on warm. Again, my color studies helped with this (I thought I had filmed them–sorry!).

The watercolor underpainting worked fine. I did two applications of it, so that I had a little richer color to work on.  It’s really not my favorite way of doing an underpainting, but sometimes it’s what’s needed.  I wanted to avoid really bright colors, so I used an analogous palette of cool blues, greens and violets. The color is still quite a bit brighter than the painting, but it wasn’t a problem.

This was fun to do but now I’m ready for spring!  I have my tiny Heilmann box filled with Giraults and hard pastels and someday soon hope to go out and sketch or paint.

Russet Leaves

Russet Leaves, 14" x 11", UART 400

Russet Leaves, 14″ x 11″, UART 400

Reference photo

Reference photo

Charcoal lay-in

Charcoal lay-in

Underpainting

Underpainting

Painting prior to changes in rock and addition of trees

Painting prior to changes in rock and addition of trees

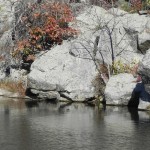
Last night I completed a fourth painting from my October pictures of rocks at Wide Water. I was determined to use different colors in this one!  The photo is all grayish white. I decided to use blues and greens and knew these colors would work well with the color of the leaves. This is the same rock and leaves in the “Terra Cotta Leaves” painting, but the view is not as interesting. The primary challenge was the rock itself. Not only was there a lot of it, but when I started really looking at it, I saw a very unpleasant face staring back!!! (this is obvious in the underpainting). There was also a cut in the rock that looked man-made, and not natural. I started out by copying the photo, but over the progression of the painting, I got rid of the face and the unnatural cut.  My goal was to have enough leaves around it, and the small bush and shadows over it to minimize the shape.  At one point, I cut down the top of the rock to give more dark, and room for the reddish browns at top. I really liked the colors I was using–no violets!  The blues worked really nicely with the colors in the leaves.  I think that the resulting painting, while perhaps not as striking as the first of this rock, is still pleasing.
Yesterday morning we had a lovely snowfall–just an inch. I left at 8:30 and went to Wide Water. It was cold but really beautiful. There was no snow on the rocks, as I had hoped, but there was snow on the trees. With frozen fingers, I snapped over 50 pictures and finally, I have the rocks as they really are with no sun–green!  I have a beautiful photo that I’ll be using as a demo for this Wednesday’s meeting of the Montgomery Art Association and I hope I’ll get photos of the demo in progress. I’m looking forward to continuing this series of paintings with a new selection of photos to work with.  And spring is on the way, so there will be new views and colors to explore.

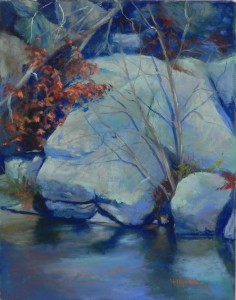
Touch of Crimson

A Touch of Crimson, 20 x 24, UART 400

A Touch of Crimson, 20 x 24, UART 400

Charcoal drawing, mixed with water

Charcoal drawing, mixed with water

Underpainting before alcohol

Underpainting before alcohol

Underpainting after alcohol

Underpainting after alcohol

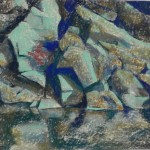
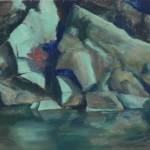
I worked all last week on a large painting of the rocks and small red tree that I painted before. I used a different photo that presented more of the rocks and set off the tree in a more traditional spot for a painting. I began with charcoal, using the sides to create the dark crevices in the rocks. There was a pattern in the photo that I don’t think I fully achieved in the first painting. I was determined to get this in the second painting. For the underpainting, I decided to use a mix of cool blue greens and warm browns and the result was quite striking.

To begin the painting, I used a Terry Ludwig “eggplant” pastel to lay in the darks. Then I went to the Giraults, at first trying out various greens and warm neutrals, but then going to violet (of course!). It IS very violet. But I was thinking of the red and what would go with it. I personally love the combination of violet and red.  I’m planning to go to Wide Water when it gets a little warmer and do some sketching/painting to see if I can capture the actual color from life. In the photos, they have a very metallic goldish glow. Fortunately, it’s a place that is nearby.
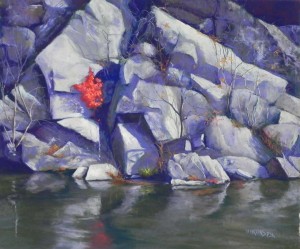
I spent a lot of time on the rocks. My aim was to keep the background rocks on left and right loose and not overly detailed. I used softer pastels on these, which went on loosely and quickly and didn’t produce the hard lines that the Giraults can produce. I started with Giraults in the area around the red tree, then put a light Schmincke on top to emphasize the light on the pieces of rock pointing to the tree. The long rock at right top was a problem. I broke it up with vines and an added tree that wasn’t in the photo. Then I went in and added pieces of dark to break up the lines.

This is a very different type of subject matter for me–not a house in sight!  There’s no depth to the picture, so it’s really a still life. But I’m really enjoying it and look forward to doing more paintings of varying sizes. I’m going to add these to my Insider’s Washington series and make giclees of them.