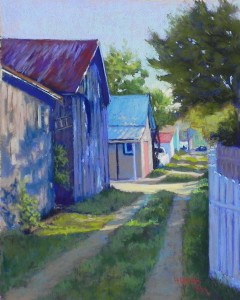
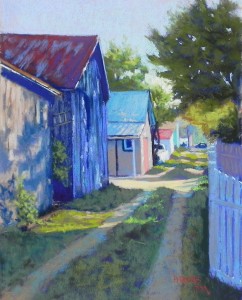
Turquoise House, Lewes, DE

Turquoise House, Lewes, DE, 14" x 11", UART 320

Turquoise House, Lewes, DE, 14″ x 11″, UART 320

Back Alley, Lewes, DEHere is the third painting that I worked on yesterday. It’s my newest and is also from our recent trip to the Delaware Bay.  We finally had sunshine late Monday afternoon and we took a walk around the neighborhood where the hotel was located. I found some interesting back alleys in light and shadow and, of course, I couldn’t resist.

The first painting is the finished one. The other was the painting as I left it the night before, thinking that it was done. But when I looked at the photograph I thought that the grassy strip was too blotchy, the large building with red roof was too blue, and the fence in the foreground was too bright and not well done.

I attacked the fence first with a Sennelier light violet that gave it an overall look that was cooler and less turquoise than what I had.  (I love the angle of the fence at the bottom, which helps invite the eye into the picture.) For the grassy strip, I used a combination of Senneliers and Unison greens (which I had just brought to the studio from home).

On the barn, I added brown, then grayed violet into it and was much happier with the color–softer and less strident, I think.

The title refers to the tiny sliver of turquoise way at the end of the alley to the left. You’ll also see a little car there.  I’ll probably try one more alley painting from Lewes, then might do a few from our trip to Cody, WY last summer.

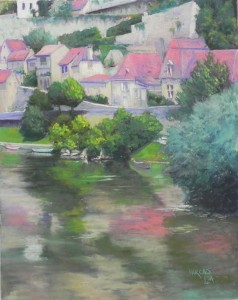
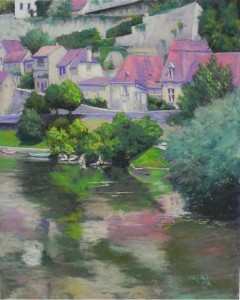
Dordogne Reflections (revised)

Dordogne Reflections, 20 x 16 (revised version)

Dordogne Reflections, 20 x 16 (revised version)

Original version

Original version

The easiest of today’s changes was to a painting that I did back in 2015 for the 2016 Pastels en Perigord show.  I loved the painting when I did it but I was reluctant to over blend the water reflections.  When I saw the picture in the show, I was immediately  unhappy with it!  So today I got my finger working and blended the water.  I was instantly happier with it. Not sure how clear it is to you, but I think you can see the difference–there was too much underpainting showing through in the original, which was a distraction.  It’s a very busy picture with no sky or breathing room and having water that was too busy didn’t work well.  Now I feel that the top and bottom parts of the painting are significantly different enough to work together.

I also added a little brighter red orange to the roofs and added some of it in the water.  That’s not as apparent in comparing the pictures.

I’m going to frame this one now!


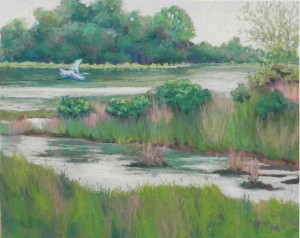
Marsh Greens (revised version of Flying In)

Marsh Greens, 16 x 20, Pastel Premiere white

Marsh Greens, 16 x 20, Pastel Premiere white

Flying in (original painting)

Flying in (original painting)

Today I spent the entire day at the studio fixing up paintings!  One that I thought was done yesterday, one from 2016, and the one I posted last!  That one was by far the most difficult.  I’ll post the others separately and tell you about my changes.

While I put my original version of this painting on Facebook and showed it to visitors in my studio on Friday night, I told them that I planned to change it.  I was NOT happy with it!  The primary problem was that the midground and foreground didn’t work with the background colorwise and with the addition of the bird, the dark bush was now competing for attention.  I’m including both images the same size so you can compare them.  There are a lot of things I didn’t like but the dark bushes were the main thing. However, I also didn’t like the orange grasses.

So I began by brushing out the bush, putting the water in behind it, then developing the lower green bushes. I used a combination of cool and warm greens in the bushes, to keep them in harmony with the background.  For the grasses below them, I used some warm and more cool greens, and cooler pinkish colors to replace the orange.  I made other changes, as well, such as filling in the little tree at top right and adding branches in a soft brown.  I also added a sense of reflection below the middle strip and then added the sky color on top so that there would be a combination of greens and lighter colors.  I also softened the dark areas under the grasses, which I didn’t like in the first version.

The bottom third was a challenge as I really wasn’t sure what to do with it. I brushed some of it off, layered various colors on top.  I ended with a warm green, given that this is the foreground, and I added a hint of the pinkish grasses into it.  I like the basic shape of it and think that it works OK.

You might notice the difference in light. I think that I forgot to enhance the original by adding a little more light to it, as I always find necessary. I did not make any changes to the background trees and they definitely appear darker in the original.

Finally, I changed the title!  I never liked the original one (John just suggested “For the Bird”!!!).  I like the new title and I think it more aptly suits the picture.

I’m happy with this picture at last and will probably frame it and include it in a show next spring.  It’s often the test of “am I happy enough to frame it” that makes me realize that changes are needed!

I welcome your comments!


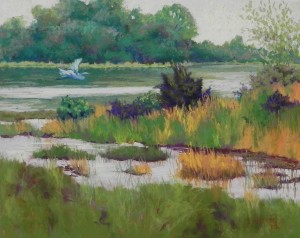
Flying In (???)

Flying In, 16" x 20", Pastel Premiere White 400 grit

Flying In, 16″ x 20″, Pastel Premiere White 400 grit

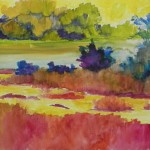
Watercolor underpainting

Watercolor underpainting

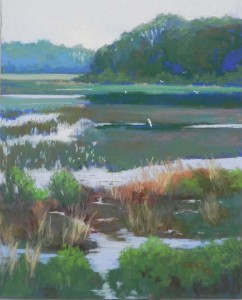
Just completed a third painting from the Delaware Bay trip after finishing a weekend class.  My final touch was to add the herron (egret) flying into the picture.  It was not easy!  More on that below.

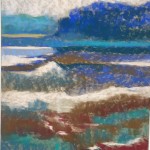
I did this on Pastel Premiere white so used watercolor for the underpainting, using warm greens under the cools that I would put on top, and warm reddish oranges in the foreground. It worked OK.

Compositionally, I made two slight changes that I liked.  In the photo, the trees are all about the same height with a lot of sky above them.  I made them go off the top and dip in places to be more interesting.  Then I moved back the shoreline at the upper right to give more distance to the picture.

I began the sky with a very light, soft red violet and went on over it with Ludwig pale yellow.  I used nothing by Blue Earth pastels in the background trees, using my boxes of turquoise, and cool and warm reds.  I did it very slowly and delicately and had such a good time with it!  These are wonderful pastels if you learn to use them with a really light touch.

The foreground was more difficult.  I began the dark bushes with red violets and added warm greens on top–this took a certain amount of give and take.  When it came to the grasses and orange reeds, I found the Giraults to be more useful.

I knew that I wanted some kind of bird flying in from the left. I did a search of the great white egret and used it for my reference. However, I used soft blues and greens, along with a little white, so he may look more like a blue herron.  I tried using pastel pencils–ended up just using them for the beak and leg and used small pieces of soft pastels for the body and wings.  The main thing is that I think I got him the right size!

What about the title?  As soon as the bird got into the picture, it was all about him!  So I came up with this for the lack of anything better.  Other suggestions will be greatfully received.

This is the last marsh picture I’ll do for now. I have a couple of pictures of back alleys in Lewes, DE that I like that would be different.

Hope you all have a lovely Memorial Day weekend.


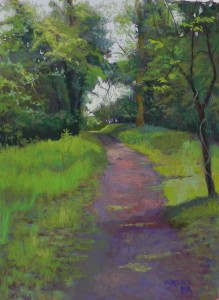
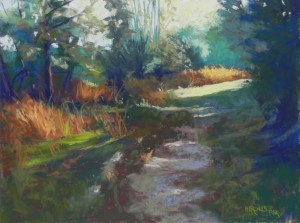
Woodland Walk

Woodland Walk, 16" x 12" Uart 400

Woodland Walk, 16″ x 12″ Uart 400

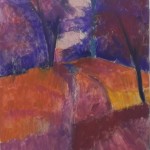
Hard pastel and alcohol underpainting

Hard pastel and alcohol underpainting

Here is the second painting that I just completed today.  This is my annual spring ode to greens!  This was from a walk in the woods at Prime Hook and I loved the spot the minute I took the picture. But it was ALL green!  I chose to do this one smaller, on a mounted 16″ x 12″ piece of UART 400.  And I did an underpainting with hard pastel and alcohol.  I used violets and a variety of oranges for the underpainting, with a pink sky.  My painting experience was a much happier one, I have to admit!

What I loved about the scene was the way the dirt path wound up into the woods with a lovely bend and a slight uphill tilt and the shapes of sky coming through the trees.  I also liked the variations in value at the top of the trees to the left.  I made a large change in the composition, however. In the photo, the entire right side was covered in leaves, probably from a large branch of a tree (you can kind of see this in the underpainting).  There was some shadow, but no trunk of tree.  I started out with a larger trunk and many leaves above it (kind of a big lollypop).  Neither Sunny nor I liked it!  So I brushed it off and put in the background leaves and grasses, then put in a more spindly tree with a few large leaves and some vines.  I was much happier with this.

For the greens, I used a range of very blue greens, very warm brownish greens, and a lot of “true” green. I used Sennelier, Ludwigs, Unisons, Giraults, and Blue Earth.  Probably some Schmincke as well.  I needed them all!

I loved my painting experience because I really took my time and used a sensitive approach to adding the color.  I particularly loved painting the upper left greenery and the path.  In the path I used a combination of Blue Earth blue violets and grayed reds (i.e., browns).  By using them very lightly I could create interesting layers of color to approximate the look of the hard, damp earth.  I really used an observed color approach on this one.

Doing these two paintings one day after another proved to me how important underpaintings are to the success of my paintings and, maybe more importantly, to the enjoyment I have in doing the painting.  Once I have a lovely rich underpainting, as I created with this one, I have the value shapes and composition laid in.  Then I can work as slowly as i want applying the pastel on top.  I’ll be showing both paintings to a critique group on Tues. and may make a few changes, but I was anxious to get something out since it’s been so long.  Hope you are all happily painting and staying dry!

Salt Marsh with Egrets

Salt Marsh with Egrets, 20" x 16", Pastel Premiere "Italian Clay"

Salt Marsh with Egrets, 20″ x 16″, Pastel Premiere “Italian Clay”

Dry hard pastel underpainting

Dry hard pastel underpainting

Hello Friends.  It’s been exactly one month since I posted my last painting!  I’ve been in Massachusetts, playing Bach, and doing other things I guess!  But this past weekend John and I spent several days at Prime Hook and Bombay Hook National Wildlife Refuges on the Delaware Bay, walking, looking at birds and taking pictures.   It was overcast the entire time, but not pouring as it has been ever since!  This rainy week has been a good time for the studio and I’ve spent three days there with two new paintings to share.  It felt really good to be back in the studio painting, listening to music, and sharing my space with a good friend.

For the first painting, I looked through my available surfaces, and decided to use a mounted sheet of Pastel Premiere “Italian clay”.  I really do like this surface, however, I also really like doing underpaintings.  Using alcohol on top of hard pastel on this toned surface doesn’t work very well (I did an experiment!). So I chose to begin with analogous colors that would be  a little different but not too much, using hard pastel.  I basically wanted to lay in the big shapes before I started with any detail.  I wasn’t sure where I was going with the bottom!  I liked the top, but found the bottom to be a challenge, so I kind of went abstract with the shapes.  Then ended up changing it and having to do some brushing off.  I ended up splitting the bottom layer of greens to allow the eye into the picture and keep it flowing.  Marsh pictures can be awfully stripey!!!

I used pretty soft pastels on over the hard and felt like I was getting a little too cakey at times.  But I was happy enough with the results.

I’m having a show at my church next year titled Shorescapes: Maine to Chincoteague.  I have lots of Massachusetts and a fair number of Maine (despite just selling one), but I needed more from this area.  So I hope to get a few more from this batch of photos.


Chinatown Reflections

Chinatown Reflections, 24" x 20", UART 320 mounted on gatorfoam

Chinatown Reflections, 24″ x 20″, UART 320 mounted on gatorfoam

Underpainting using hard pastel and alcohol

Underpainting using hard pastel and alcohol

This afternoon I was able to put in a couple of hours at the studio and (hopefully) completed my latest painting of the Chinatown area.  I’m calling this one Chinatown Reflections because it was the window reflections that most attracted me to the photo, which is otherwise not terribly exciting.  It’s very dark and very light and there is too much sidewalk.  But I decided to do it anyway.  I began the drawing and painting during our Open Studios weekend two weeks ago, and I’ve been working on it ever since.

From the underpainting, you can see that there were only two figures originally.  And these aren’t the two that were in the photo!  I tried them out and didn’t like them, so I chose others from other photos, but kept them in the same place so that the proportions would be right.  However, there was WAY too much sidewalk and I decided to add a third figure at the bottom.  I based this on the figure in my first Chinatown painting but changed him a bit.  I like the fact that the three figures form a triangle, as do the two men and two trash cans!

I had another compositional problem in that the street seemed too high in proportion to the horizon.  With help from my friend Sunny, I decided to add a car next to the truck (actually in the photo) and I made the line of the road (obvious in the underpainting) less slanted.  Now, I think it looks fine.

This is a very busy picture–much more so than my first one.  There are many signs, cars, window reflections, and people!  My original plan was to minimize–leave out the car next to the truck, omit the yellow sign, etc.  But I found that all of these elements were needed and helped balance the color in the painting.  And it was hard making up what would go in without them.

I began with the sky and then the buildings on the left. I wanted to keep them suggestive and brushed in color without using a ruler or worrying about the window sizes.  I particularly enjoyed doing the part above the cars, just lightly adding color and finally the red sign.  There are reds throughout the picture which help balance the colors.  However, the sidewalk was a challenge and still is!  I began the underpainting with blue, then used magenta on top. That color was impossible to subdue. You’ll see I added a lot of blues and blue greens on over it, which now make it look purple.  I added light pieces of brick to make it more interesting.  But it’s a lot of the same color.  I used some similar colors in the upper part of the building on the right, hoping to make it more cohesive.

The tree is really important and I worked on it off an on throughout the picture. Most of it had to be done after the sky and building was done.  I really like the gracefulness of it.  (I thought about calling this “A Tree Grows in Chinatown”!)

Next week I’ll be in Massachusetts visiting my mother and giving a two day workshop.  Fortunately, my demo will be trees, water, and bushes–no people, signs, or vehicles!

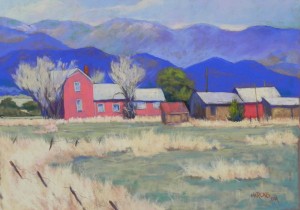
New Mexico Farm

New Mexico Farm, 14" x 19", Pastelmat brown

New Mexico Farm, 14″ x 19″, Pastelmat brown

I am now happily in my new studio at Artists and Makers, getting ready for Open Studios weekend tomorrow through Sunday. But on  Tues. I got to spend my first day painting and I decided to paint a picture that I gave to my class in black and white.  It was interesting to see what they did with it re cropping and color. When I went back and looked at the color image, I was surprised at how much I liked it. So I decided to use it pretty much as it was with some adjustments to the composition.

Interestingly, this is my second picture in a row that uses primary colors. I hardly ever use this palette, but here it is once again (after the Chinatown picture).

I also didn’t do any underpainting on this as I was working on toned Pastelmat. It was fun to have a minimum of drawing to do and be able to get right into the color. So I pretty much went straight for the color with the exception of the roofs, which were all very gray. I used a light green, then some pink and blue and varied them, using brighter color on the bright red building at the right.

It was really fun to finally work in my new space with a good friend and such beautiful light!  I now have windows on the north and west. I was worried about possible glare, but it’s working fine.  I hope that some of you in the area can come by this weekend.  I’ll have this painting and my New Hampshire Farm on view, along with three walls of framed paintings, new reproductions and some small giclee cards.  Now, if we can just not have a snow storm on Saturday, that would be really nice!

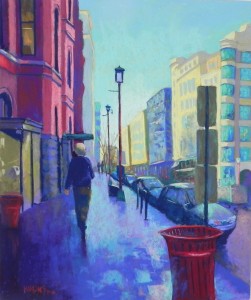
In Chinatown

In Chinatown, 24" x 20", UART 320 mounted on gatorfoam

In Chinatown, 24″ x 20″, UART 320 mounted on gatorfoam
Underpainting, hard pastel and alcohol

Underpainting, hard pastel and alcohol

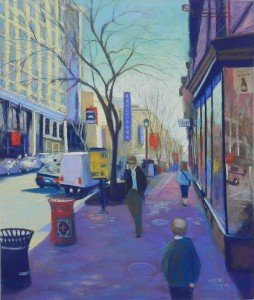
Today I finished a 24 x 20 painting that I began drawing last Sunday.  The reference photo was taken several weeks ago when it was unusually warm. John and I went to the National Portrait Gallery to see the Obama portraits, then walked around Georgetown and Penn Quarter with me taking photos with my cell phone.  The colors are really vivid in them–a wonderful change from the dull landscape.  This one struck me right away because of the reflection of the sky in the sidewalk.  It wasn’t a wet day, but the bricks must be treated to reflect and shine.  The bright red trash cans really appealed to me, along with the lantern lights and colors of the buildings.  I had to get rid of a lot of people, however!  I kept the one man walking and added two small people in the distance.  Much better!  Some of the people I removed were to the left of the walking man. I replaced them with another red trash can (note the lovely, elegant design of these trash cans!!!)

I gave a lot of thought to the color as the palette is basically the primaries–red, blue and yellow. Not one I normally use. My main concern was balance. I really liked the fact that the red can was in the right foreground, to balance the  buildings on left. And, in the background buildings, there are little bits of red from street lights, signs, etc.  And the yellows of the buildings on right are mirrored by the darker yellowish brown glass enclosure on the left.

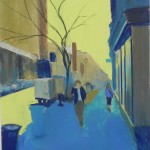
For the underpainting, I use a yellow for the sky, greens and blues under the reds, and brownish colors under the yellow buildings.  I just kind of winged it!  No real pattern.  I combined a yellow and light violet for the sunlit sidewalk and was quite happy with the way it appeared with the alcohol.

I dealt with the cars by keeping them simple, focusing on shapes of dark and light. They all seemed to be gray with reflected light from the sky, which made it a lot easier.  I also added a truck on the right and tried to keep the buildings as suggestive as possible, not worrying about the windows or the details below.

My main concern was getting the glow on the sidewalk.  I began by using a red violet underneath, then brushed on various blue greens.  What I really liked was the fact that the man was the dividing point between the shadowed and sunlit sidewalk.  This worked quite well, but I added a small hint of the light aqua on the left so that it wouldn’t seem unreal.

I used my new Roche pastels for the buildings on the right, mixing a light blue with yellow oranges to make the shadows.

Last Monday, my students wondered whether I’d be keeping in the pole with three signs on the right.  I definitely wanted them!  They provide a contrast to the sunlit buildings behind.  And I also decided to add the bicycle rack that wasn’t in the underpainting.  Signs, trash cans, light posts–all part of the city and important.  But I was glad that I could minimize the people!  The one guy walking away from me was quite easy to do.  Much harder when someone is facing you.

One concern today was the awning above the man and whether that looks like a hat or something odd.  I toned it down a bit and decided to leave it.

This was a really fun painting to do, even if it required a lot more thought and effort than my typical landscapes. I have more pictures to work from, but probably not this month. I’ll be moving downstairs, to a larger, sunlit studio at the end of the month.  All of my classes will be held there and i’ll no longer have to deal with stairs, nor will my students.  A positive move for the future.  But a lot of work to do to get there!
 

Into the Light

Into the Light, 12" x 16", UART 400

Into the Light, 12″ x 16″, UART 400

Underpainting, hard pastel and alcohol

Underpainting, hard pastel and alcohol

After my recent paintings, that required a lot of drawing and concentration, I decided yesterday to do something that might be a little freer in nature.  I had been wanting to paint this scene from a bog in Marion, MA taken last Oct.  I liked the composition and the placement of the light.  I had a 12 x 16 mounted UART board and decided that I would begin directly by applying blocks of hard pastel–no drawing.  It worked fairly well, but I can’t say that I was terribly pleased with the underpainting.  In retrospect, perhaps one brown pastel applied with more or less pressure might have worked nicely.  But, it didn’t matter too much as I covered most of it up.

I used a combination of soft pastels and Giraults to lay in the sky and trees in the upper part of the painting. I tried to keep the strokes fresh and not overdone, particularly with the pine in the upper left corner.  Then a variety of cool and warm greens for the foliage and grassy roadway at the bottom.  For the sandy soil area of the path, I used a combination of grayed green, grayed red and blue violet.  Then used a very light pinkish Schmincke for the pieces of light.  The color was just right–light but not as warm as the yellow above.

The grasses on the left had a lot more light on them in the photo, but this could have been a distraction with the main area of light in the upper right, so I kept them a little muted.

This is not an award-winning painting!  But it was fun to do something a little more spontaneous and I may give this more effort.  I’m struggling a bit at present to find subject matter to paint.  This winter has been cold, wet, and gray and totally uninspiring! Sometimes I look at the amazing detail in many award-winning paintings and think I could be happy trying to achieve that.  But I know that I don’t really want to go that route. I call myself a “painterly realist” –not a photo realist — and I want to keep that in mind.

Anybody else having issues with subject matter or style?