Autumn’s Brilliance, Adamsville RI

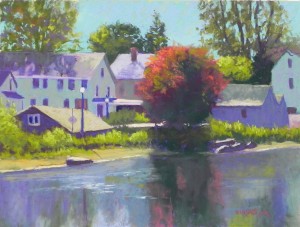
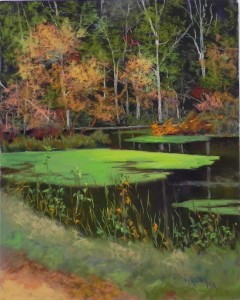
Autumn's Brilliance Adamsville, R.I., 12" x 16" Uart 320

Autumn’s Brilliance Adamsville, R.I., 12″ x 16″ Uart 320

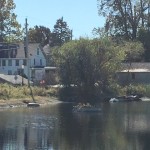
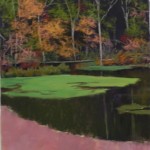
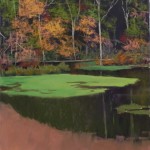
Reference photo

Reference photo

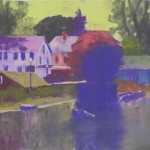
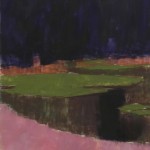
Underpainting, hard pastel and alcohol

Underpainting, hard pastel and alcohol

I had a few free hours today and decided to go to the studio.  I had already found a photo to paint from and done and compositional drawing and had it on the board.  But the real challenge in the picture was that it was really blah!  It was taken in autumn and there were wonderful reds on the trees by the gas station but not here by the lake!  Adamsville is a lovely small town  on the border of Mass. and R.I. and I’ve been there to paint and film many times.  In looking over potential photos a week ago, I realized that this one–though lacking in color–had wonderful shapes in the buildings.  So I decided to do it and envisioned making the tree red and the shadowed white buildings shades of blues and greens.

For the buildings, I used several colors in each to give the sense of shadow, not wanting flat colors.  I played with really deep darks and bright lights, to emphasize the idea of a bright, sunny day.  The backlighting of the tree was one of the things I thought could be most appealing and I think that it’s worked.  I used dark green, then a dark red, with brighter reds and oranges on the sides, and a duller red in the reflection.

The water was extremely easy to do!  I used a blend of violets grayed blues and a little of the sky color and burnished it all with a Girault.  Then added the light on the water with a very light blue green soft pastel.  Of course I had to make up the red reflections!  But I think they work OK.

I’m happy that I found this picture and saw the possibility in it.  I’ll include it in my spring show called “Shorescapes”.  It may be a little inland, but there is water and it’s very close to the ocean!

Hope you all have a lovely Christmas — or had a wonderful Hannukkah!  2019 promises to be anything but boring!!!


Grace

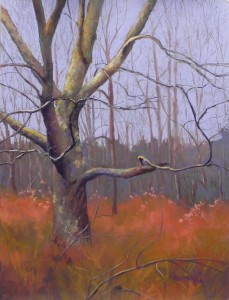
Grace, 24" x 18" Wallis Belgian mist (!)

Grace, 24″ x 18″ Wallis Belgian mist (!)

Early stage

Early stage

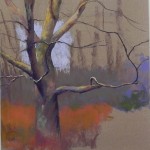
A few weeks ago John and I took a Sunday afternoon walk at Lake Frank. It was overcast and the leaves were gone but i brought my phone with me, just in case.  I took some photos but didn’t get very interested until, on the way back, I saw some bare trees standing in a field of grasses.  I took a number of pictures and realized that I had something.  I remembered the grasses as having a reddish brown hue to them, but trying to make them more interesting in Photoshop turned them into a warm yellow brown, which I didn’t want.  So I decided I’d just wing it and push the color a bit!

When I moved my pastel cabinet to my new studio last spring, I discovered two 18 x 24 sheets of Wallis Belgian mist, which I’ve been saving for something special.  I knew that this was the perfect match!  I didn’t want an underpainting. I wanted to be able to draw and react to the paper and enjoy it and I really did!  It’s a pity that this paper is no longer available but the Italian clay Pastel Premiere is quite good.

I began with a drawing of the tree and the idea that I’d make the background recede. In the photo, the background trees are more prominent and the same color and value as the big tree.  I used Giraults to fill in the background trees (the solid part). Then I found a small piece of light soft violet that I began applying to the sky and loved it. I decided that it was  a Schmincke and was SO happy to find that I had an entire replacement stick in my cabinet!

At one point I thought about doing a vignette and not filling it all in, but I realized that it wouldn’t work well. So I put the violet over the entire background, then used on Girault to lightly indicate the trees. I used Giraults for the grasses as well and let them blend in together, using various reddish browns and a warm brownish green.

For the tree, I started with Girault, but moved to softer pastels and ended up using very light applications of Blue Earth, using the grayed violet, cool green and yellow sets.  I thought I had finished the painting on Monday but when I looked at the photo, I immediately said “this tree’s too fat”!!!  You can see it in the early stage image.  So I carved away at it on the right side, using the colors of the sky and grasses to shave it off. I also added lichen to the trunk in several places as it was looking too much the same in my photo.

I had been thinking about calling this “Quietude” but today in class my students talked about the gracefulness of the tree and I decided to call it Grace.  I’m happy with this one!


Who are you? Who are we?

Who are you? Who are we? 14" x 11" UART 320

Who are you? Who are we?
14″ x 11″ UART 320

Reference photo

Reference photo

Underpainting before alcohol

Underpainting before alcohol

Underpainting with alcohol

Underpainting with alcohol

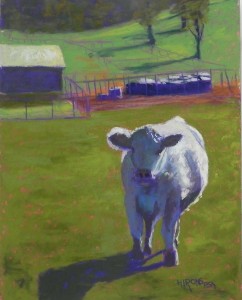
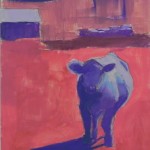
And now for something completely different!  In late October my husband and I drove to Pennsylvania to see a fellow who I visit in prison.  On the way we drove through rural Maryland and I stopped and took pictures.  I was running up the road in Uniontown to take pictures of the backs of houses when this fellow took a real interest in me!  I was instantly besotted!!!  What a gorgeous cow–well, steer I guess.  Anyway, his innocent look and the lovely light and shadow on him were just wonderful.  Two days after taking the picture, the shootings at the synagogue in Pittsburgh took place.  I decided to use this painting to say something about my unhappiness with the state of our country and its leadership.  The rising level of anti-Semitism is something I hoped I’d never see in this country.  So, this is where the title comes from.

During one of my classes, I did a quick drawing of him.  It came out really good.  I measured it as a 12 x 9 and my idea was to enlarge it to a 24 x 18.  I thought he’d be the perfect project for our Open Studios weekend.  I spent all Friday night trying to draw this &&^^*^% cow! People kept coming in and giving me advice and I finally gave up.  As I mentioned in an earlier post, the 18 x 24 board was used to do the Towpath, Violette’s Lock painting and I was very happy with that.

But, I still wanted to do Mr. Cow. So I decided that the answer was to trace my drawing and use an 11 x 14 board.  I used tracing paper and decided to try using pan pastel on the back of the drawing.  It barely gave me an image–don’t do this!  But I got the drawing down, then refined it.

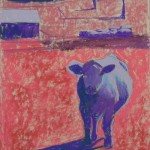
There wasn’t much color in the photo, as you can see.  Greens with a white cow in light and shadow.  I wanted my cow to be colorful but not electric blue or purple, as you see in some paintings!  I used Caran de’ache hard pastels for much of the underpainting because they have light violets and blues that aren’t available in NuPastel.  The red under the grass is also of this brand.  I was worried about doing the underpainting, having gone through such agony with the drawing.  But it worked OK.

I kept the background pretty simple. In the photo, the roof and the light on the cow are about the same.  I started with a green in the roof and added some yellow, but nothing like the light on the cow.  One thing I’m not sure I’m pleased with is the use of the cooler green in the grass in the background.  It probably should be closer to the foreground, as seen in the photo.  (A note also that when I was trying to do this as an 18 x 24, the large amount of grass was much more of an issue than it is in this smaller size.)

For the cow, I layered violet, blue, green, and brown in the dark areas. For the light, I began with a bright, very light blue green, then pink, some yellow, light violet, then an Art Spectrum extra soft lemon yellow which really made him come alive!

This went very quickly and I enjoyed doing it.  I could have spent more time on it, perhaps, but I think it says what I wanted to say.

Autumn Walk, Violette’s Lock

Reference photo

Reference photo

Early stage

Early stage

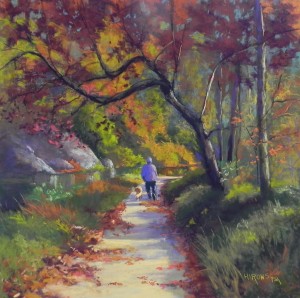
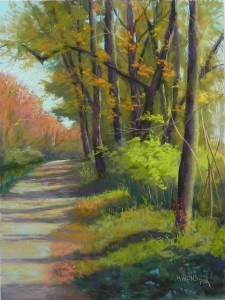
Autumn Walk, Violette's Lock, 20" x 20", UART 320

Autumn Walk, Violette’s Lock, 20″ x 20″, UART 320

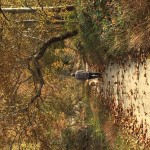
Yesterday I finished this 20 x 20 painting that I started several weeks ago.  I decided to do it, even though the reference photo was not very inspiring–color or value-wise. I’m including it so you can see how little value variation there is in it. (Sorry, I can’t seem to get it right-side up!)

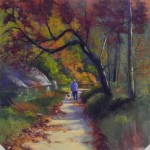
My underpainting was just a lot of color with the tree and towpath delineated. I brushed alcohol on with a big brush and I basically had a brown surface!

There were a number of challenges with this painting. First, the subject is right in the middle.  I decided that was probably OK.  The towpath and canal lead the eye past the subject to the right so I felt comfortable with it.  Second, there wasn’t much of interest along the canal on the left side.  There was some kind of rock there barely visible. So I made up some rocks to give a little more structure and interest to the painting.  The major problem was the lack of value differences–even sideways, you can see that the only things that stand out are the light towpath and the dark tree. All of the foliage is about the same!  So I decided to make the leaves on the tree darker, using several values of deep Ludwig reds.  Behind them, I placed various greens and oranges and a blue green.

The picture called “early stage” was what it looked like on Saturday morning when I went to the studio prior to class.  I really didn’t like several things. First, the red leaves at top were identical blobs of color!  Second, the orange to the right of the man was too extreme. It detracted from the man and his dog, who have to be the center of interest.  I resolved the latter issue by placing greens on over, letting a little orange show through.  I resolved the first problem by breaking up the reds with a deep blue green.  I loved the effect of this!  I also decided to try using a rubber blender to “pat down” the leaves in the distance to set them back and give a more dreamy quality to the scene.  I finished the lower right corner yesterday morning and make a few more small changes, then let it go.  I decided that this was the type of painting one could work on forever!

It can be hard to do paintings that have no sky. The sky opens things up and provides a lightness that’s missing when all one has are trees.  But I think that the light on the towpath gives the painting some cheeriness and leads the eye to the man and his dog.  (And, by the way, this dog was really easy to do!  Not much more than a few strokes and I had the back of a collie!!!)

The man’s coat in the picture is a black and white check. I had thought about making it red. But I instinctively picked up several violets and liked the relationship between the man’s coat and hat and the rocks to the left.  I’m happy with the balance of color.  Interestingly, when he walked by me, he said “not much color this year.”  I watched him go and realized I had the perfect subject!

Break in the Clouds

Break in the Clouds, 12" x 16", Pastel Premiere "Italian clay"

Break in the Clouds, 12″ x 16″, Pastel Premiere “Italian clay”

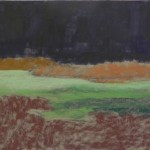
Partial underpainting and block in

Partial underpainting and block in

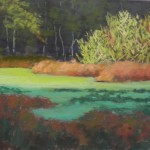
Early stage of completion

Early stage of completion

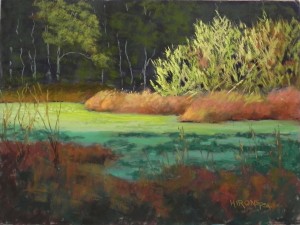
Today I did my second demo of the week and my second painting from the McKee-Beshers preserve in Poolesville, MD.  Like the first one (Sun on the Marsh), the background is just trees and quite dark.  Unlike the first one, however, the background trees have no light and there is a group of bushes in dramatic sunlight in front of the trees.

I chose a 12 x 16 mounted sheet of Pastel Premiere Italian clay to work on. I drew a composition using charcoal lightly on the surface.  One of my challenges was that the photo was not good. I had captured only a portion of the bushes in light and the bottom shapes were really boring.  I looked at other photos and combined them to come up with what I thought would be a decent composition.

After I did the purple underpainting, I used some Giraults to lightly lay in the shapes of the water and plants growing in the water. This is all watery with various types of plants growing and in light and shadow.  Once that was done I lightly indicated the bushes over the background to mark the shape.

For the background trees, I used several warm green Giraults and lightly brushed in foliage then added trunks with a light grayed blue green. Then I added the foliage of the large tree coming down on the left. I kept it to two fairly dull greens, so as not to compete with the bushes. I began the sunlit bushes with a light yellow green Girault, a sienna, and several values of yellow and brown.  I didn’t want to go to a bright yellow at first.  At one point it was decided that I hadn’t left enough holes, so I used the eggplant pastel to create them and it worked great.  (You can see the difference in the two photos of the initial and final completions).

I really liked the effect of using cool blue green in the water to denote the shaded area but my students had problems reading it and I ended up adding more of the dark green leaves and changing the shape of the reddish bottom.  For the warm sunlit water I first put in some Girault whitish green and yellow green, then some Blue Earth, then a little Roche. I kept experimenting!  Finally, I realized that the same plants were growing in this area and needed to be at least hinted at so I used my Blue Earths to put in small specs of lighter and darker greens.  With the water to my satisfaction I could then add some vertical twigs over in the lower left corner.

My final notes were in the bushes and grasses below them where i went to soft pastels, added a real yellow at the top and several oranges in the grasses.

All of this took exactly 2 hours!  I got lots of useful comments from the class and really enjoyed the exchange, even the harangues!  It’s a better painting because of their input.

Towpath, Violette’s Lock

Towpath, Violettes Lock sm

Initial charcoal drawing

Initial charcoal drawing

Charcoal with water

Charcoal with water

Underpainting before alcohol

Underpainting before alcohol

Underpainting with alcohol

Underpainting with alcohol

We had Open Studios weekend this past weekend and I always like to work on a fairly large painting during that time.  During a trip to Pennsylvania two weeks ago, I had taken a picture of a lovely young steer who was looking at me, with farm yard behind him.  I fell in love with this guy and I did a 9 x 12 drawing that came out quite nicely.  I decided to double it and make it a 24 x 18. I spent all of Friday night trying to draw the steer on my paper.  People came in and gave me advice and I kept erasing and changing.

On Saturday morning, I decided it was time to scrap this idea. I had taken a walk at Violette’s Lock on the C&O Canal on Thurs. afternoon and i had a picture I thought had real potential. (My husband didn’t think so!)  So I went to the studio early and erased the drawing. (If you look at the initial drawing, you can still see a little of him on the lower right side.  It would have been a terrible composition!)

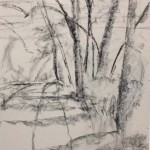
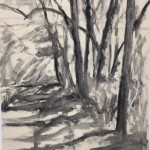
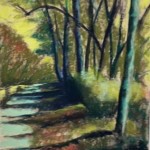
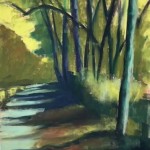
Not having done a drawing or any studies, I decided to work loosely. I took compressed charcoal and drew in the trees and shadows of the towpath.  I then applied water to this. It was SO freeing after the difficulty of drawing an animal!  I then added the underpainting and I lightly brushed on the alcohol with a wide brush moving from top to bottom. It worked really well.

The reason I took the photo was that I saw the potential of the green bushes catching the light. In the photo, these were smaller and much less pronounced–and right in the middle of the picture. I expanded them and liked the shape and I was pleased how well it came out in the underpainting.  As visitors came in at various stages, they could clearly see where I was going with the painting.

I have to say that doing this painting was sheer joy!  But I had some challenges, primarily with the towpath and its shadows.  Getting the values right was not easy. The shadows were darker in the grassy areas than on the dirt path. And I was looking at my IPAD, which is a squarer format, and making it into an elongated 24 x 18.  But it worked.

For this painting, I used a lot of Henri Roche pastels.  I won a set last year and decided they would work nicely in this painting. They are highly pigmented and soft but not buttery.  The orange pieces in the trees are all Roche. However, for the light greens, I used Unisons and softer pastels, which worked better.

One of the last things I did was to add light values of aqua into the dirt towpath, and a darker turquoise in the shadowed area of the grasses at bottom. I liked this a lot.

Someday I might try to do my steer. We’ll see!


Sun on the Marsh

Sun on the Marsh, 20" x 16", UART 320

Sun on the Marsh, 20″ x 16″, UART 320

Initial underpainting

Initial underpainting

Early stage

Early stage

Revised underpainting

Revised underpainting

Initial "completion"

Initial “completion”

Hello Friends. It’s election day and we are all nervous. I’ve been reading hopeful stories of possible new members of Congress, but on the whole, I’m trying to focus on something else. Over the weekend I did a large happy painting, and yesterday I did a demo. I’m sharing the demo with you first.  This one was a challenge as the background was basically black with very lacy leaves and white trees. Quite exotic!

I decided to use a Ludwig “eggplant” pastel for the dark background. It’s much richer and darker than any hard pastel and I wanted to leave parts of it showing through.  I used regular hard pastels for the rest of the very abstract underpainting–just shapes.

I used a series of Giraults to lightly lay in the trees and foliage over the dark background.  I used a dark brown, warm green, and some of the eggplant for the water.  For the green pond scum in the middle, my initial thought was to do a “Tony Allain” swoosh of saturated color. But when I did it, it really was NOT GOOD!  So I brushed it off, put in some Girault and later added two values of Blue Earth greens on top.

I decided that the initial pink in the bottom was terrible!  So I added more brown to it and more alcohol and liked the color much better.  Then I added the grasses on top and the vertical pieces, using both the sides of Giraults and some sort Blue Earth to make interesting marks.  My class wanted more dark in the foreground, which was very light in the photo, so I decided to add an indication of leaves against the grasses.  I liked this as the bottom left corner now picks up the colors in the top.

This was a fun painting to do as it took some thinking about how to do it.  I discussed strokes with my class and this painting had a wide variety of them.  I’ll be doing another demo tomorrow, probably of the same area.  For those in the DC area, this is the McKee-Beschers reserve on River Road in Poolesville, past Seneca.  It’s a lovely area to walk, but in the fall you hear the pop of guns all over!  A little disconcerting.

Lunch in Chinatown

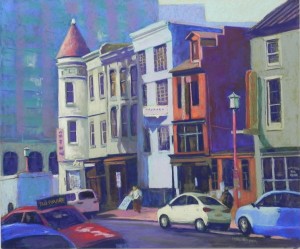
Lunch in Chinatown, 20 x 24, UART 320
Lunch in Chinatown, 20 x 24, UART 320

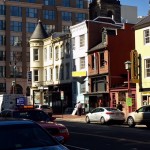
Color photo reference

Color photo reference

Hello Friends–It’s been some time since I’ve put out a blog post.  But at last I have a new painting–and this one took a whole lot of work!  I wanted to do another painting of Chinatown in conjunction with a show of my DC paintings.  I looked through the images from last February and found one with interesting composition but not so great color.  So I printed it out in black and white and went from there.  I”m including the color image so you can see what it looked like and how different it is from my painting.

I wanted the building at left with turret to be the center of interest. But the white building in the middle is grabbing more attention, as is the yellow building on the right.  Also the building behind the turret sets it off nicely but it’s rather dark and foreboding and there is another dark building just above the white one that I decided to omit.  But there were many things I loved about the picture–the variety of shapes in the buildings, the signs, the people on the street and the cars pointing to the turreted building.
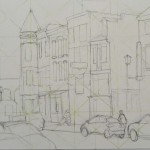
Initial drawing
Initial drawing

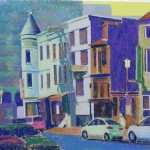
Underpainting before alcohol
Underpainting before alcohol

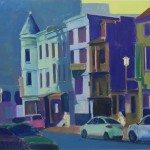
Underpainting after alcohol

Underpainting after alcohol

It took me an entire afternoon to do the initial drawing.  I used Chris Iver’s method of graphing in the picture from the photo. You can still see some of the lines in the drawing.  Then I chose colors for the underpainting.  When I did the background building I tried laying in colors in horizontal and vertical stripes and realized that worked pretty well. I lost it with the alcohol, but did it again with the soft pastel over the underpainting.  My students came in and loved the crazy colors in the underpainting and begged me not to change them!!! However–I did and really needed to, of course.

Once i began painting, I realized that I was having a problem with keeping the buildings straight.  I brought my T square ruler from home and had to completely reddo some of the buildings and windows!  But at least it looked good. The other challenge was that I never established a vanishing point. It would have been way off the picture. So I eyeballed it–not always successfully.  But with help from my pastel friends, I finally got it in good shape.

I wanted to explain some of the color choices I made in terms of the composition.  First, I changed the black turret to red–why not!  I basically went with some of the color in the 3 buildings on the left–all in shades of greens and yellows, leaving the lightest, brightest yellow for the left side.  For the tall white building I decided to use blue to keep it cooler and I added a little light red violet into it to give it more dimension.  For the building to the right of it, I went with the warm orangey red color in the photo, but I added some grayed green into it to tone it down. In the dark right side of the building I used dark reddish brown and blue violet Ludwigs. I found that the combination vibrated!  I wasn’t sure where I was going with the final building. I had used a warm green undercolor and decided to put a cooler green on top allowing some of it to show through.  I tried to keep the edge of the green building against the dark on the soft side, so as not to distract from my center of interest. This was all about value.

I intentionally used the same yellows in the little car pointing to the building and chose blue for the one behind it.  Now the blues and reds and yellows can carry the eye throughout the painting.

I put a lot of effort into my little people and was particularly pleased with the man next to the yellow car.  Doing these small figures in soft pastel (pencils are just too hard) is tricky and I’m always amazed when it works.

Finally, I did a little more with the background building and put a hint of light in the windows.

I am happy with the way the painting came out.  I decided to call it “Lunch in Chinatown” because of the many restaurants including Asian places, Matchbox, and Potbelly. I really had fun making up Chinese symbols for the signs!  And I’m happy with the way the “Potbelly” sign on the right came out. I kept the values close and also toned down the value of the cast shadow.

I’m happy to be back and hope that the next painting and post won’t take quite as long. Interestingly, today I sold the “Wild Roses” painting from my last post!  And my show was quite successful. So I’m happy!

Back to work!

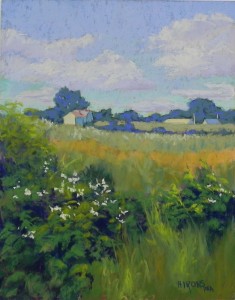
Wild Roses, 14" x 11", UART 320

Wild Roses, 14″ x 11″, UART 320

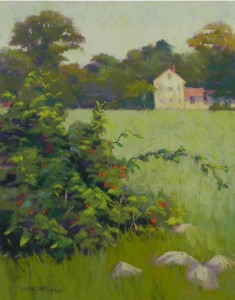
Rose Hips, 14" x 11", UART 320

Rose Hips, 14″ x 11″, UART 320

On Tuesday I spent a day at the studio and it was lovely!  I hadn’t picked up a pastel in some time. I’ve been teaching a workshop on drawing the landscape as preparation for painting and my focus has been on that–and my mother’s service, which was last week.  The workshops are over and were quite successful. So I decided it was time to paint.  First I finished off a painting I had begun in early July, then I did  a new painting. Both are from the same location from pictures taken in June and August.  In June the weather was beautiful and we had just been at my mother’s 99th birthday party.  Things seemed good.  In August, of course, I was there for her service and it was a sadder time.  In June the roses were in bloom and filled the air. What we saw in August was the beautiful rose hips.  So I focused on these two things.  Both paintings are from the Slocum River Preserve in North Dartmouth, Mass. A beautiful place to walk and paint.

Both were done with underpaintings, which for some reason my cell phone is refusing to send to my email account!  I particularly liked the one for Rose Hips. The sky was done with yellow green and the background trees were all violet.  It gave a real mood to the picture.

In the Wild Roses painting, the photo showed the house at the top of the hill. When I went to paint it, I decided that it needed more, so I lowered it a bit and added an extra filed and another layer of foliage.  All of the foliage in the back is done with the same blue green over the underpainting. I purposely kept it flat, a little stylized.  For the foreground, I decided to not get too detailed and put it in fairly quickly.  I did the same thing with the second picture.  I wanted the effect of leaves without too much detail.

I decided to use green in the sky in Rose Hips, influenced by my underpainting and the desire to make this a nostalgic, more moody picture.  I really liked it and used a little darker green in the field. I used mainly Giraults.  I simplified the farm house and liked the effect of the reddish roof, over which I added some green to keep it down.  I worked quickly with the bush in the foreground, adding the orange rose hips last.

I had no printed photo for these. I just propped up my ipad on an easel near my working easel, but didn’t look at it a whole lot as I was diverging so much from the photo!  I find that not having the photo right next to the painting makes it easier for me to focus on the painting and am not as likely to copy the photo.

This fall’s classes will focus on composition and mood, so I’ve been thinking about both lately.  I do think that these two paintings have very different moods, primarily due to the color of the skies.  I’ll start teaching Sept. 22 (Sat.), 24 (Mon.) and 26 (Wed.).  Looking forward to seeing old friends and working with newcomers as well.

Happy Labor Day weekend!  With this heat, I’m not too sad to see summer ending.  A long, cool fall would be most welcome!

Jean

Not painting right now

Hello Friends

It’s been awhile since I’ve put on a new blog post. I haven’t disappeared!  But I’m in a quiet mood and not painting. My mother passed away last week after 99 years of a wonderful life.  The last weeks were tough on my sisters. I was in Europe, feeling very guilty, needless to say.  But it’s over and we will have a lovely celebration of her life two weeks from today at the Mattapoisett Congregational Church, the church I grew up in.

I’m not completely apart from art however. I decided in the spring to give two 2-day sessions of a landscape drawing class. We had the first session  last Monday and the others will be on succeeding Mondays this month. It’s something a little different and kind of fun. And I have a very wide range of people coming to the workshops, in addition to my regular students.  The first session focused on trees, clouds and perspective of buildings. Our second session will focus on compositional sketches, values and value studies, and how to transfer drawings to the painting surface.  I decided to do these workshops because I realized that standard drawing classes don’t regularly include landscape elements.  It’s been a great learning experience for me as well!

And–this past week I purchased a grand piano!  I’ve played piano most of my life and have a lovely upright that I bought about eight years ago. But I had the opportunity to play an Estonia 6’3″ grand on Tuesday and fell in love with it.  Went back Friday morning and signed on the dotted line!  It’s coming on Wednesday.  I guess I’m looking at my life, after my mother’s passing, and realizing that I probably have 20-25 years left to play. I might as well have a good piano to play on.

In September, I’ll be resuming my regular classes with a focus on composition and mood. I’ll also be teaching 6 Saturday sessions.  And on Monday afternoons, I’ve invited a group of women pastelists to join me in the studio to paint together.  I”m very much looking forward to that in the hopes that we can critique and inspire one another.

I hope that you are having a good summer.  August is a time to rest, I think. Take it easy. Enjoy the fresh fruits and vegetables that are in abundance.  Read. Don’t feel guilty about anything. Do what you want to do!

I’ll be back in September, I’m sure.